POWERLIFTING-CALCULATOR

Category: Uncategorized

  • Powerlifting Meet Prep: Timeline, Checklist & Meet-Day Plan

    Powerlifting Meet Prep: Timeline, Checklist & Meet-Day Plan

    Meet day is your chance to show the strength you already built.
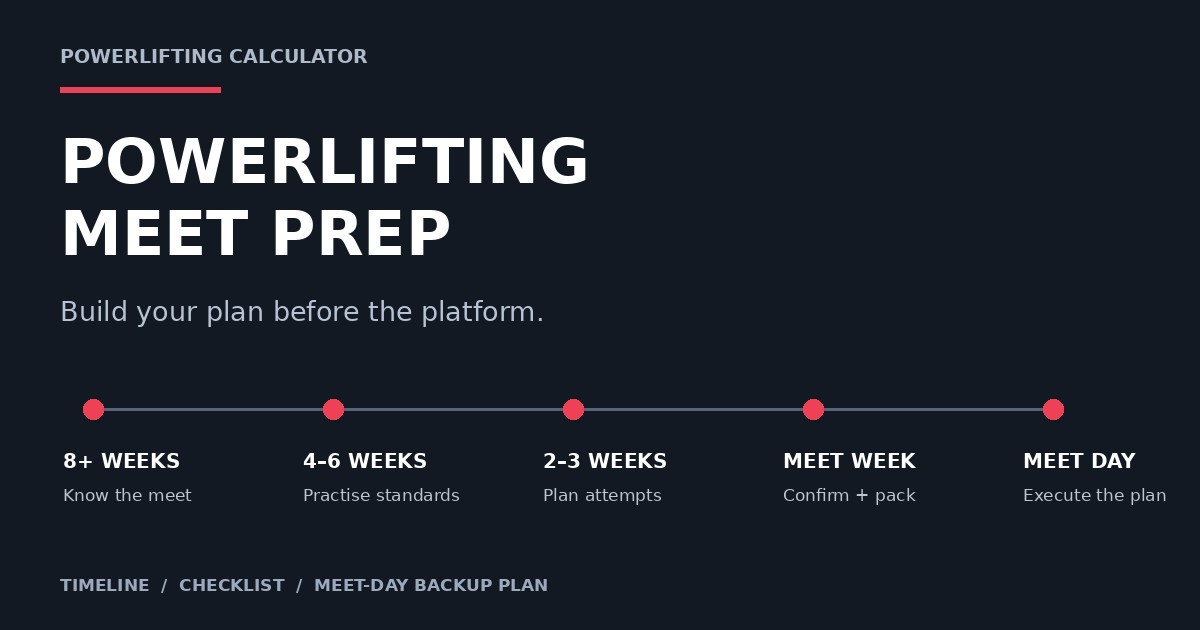
    Powerlifting meet prep timeline: know the meet, practise standards, plan attempts, confirm and pack, then execute on meet day.

    Good powerlifting meet prep is mostly about removing avoidable problems before they reach the platform: unclear commands, rushed warm-ups, aggressive openers, forgotten equipment, last-minute weight decisions and a meet-day plan that exists only in your head.

    This guide gives you a practical countdown from the final weeks of training to your last deadlift attempt. It does not prescribe one universal powerlifting program. Instead, it focuses on the decisions that make a meet easier to execute: rules, equipment, competition-standard lifts, bodyweight, attempts, warm-ups, travel and timing.

    Meet in less than a week? Jump to the meet-week checklist or the 48-hour final check.

    Meet Prep Progress Tracker

    Add your meet date and tick off the preparation steps as you complete them. Mark an item complete when it is done or you have confirmed it does not apply to your event.

    Saved only in this browser. No account required; your checklist is not sent to our server.

    Add your meet date to highlight the most relevant planning section.

    8+ Weeks Out · Know the Meet
    8+ Weeks Out · Know the Meet
    4–6 Weeks Out · Practise Competition Standards
    4–6 Weeks Out · Practise Competition Standards
    2–3 Weeks Out · Build the Plan
    2–3 Weeks Out · Build the Plan
    Meet Week · Reduce Uncertainty
    Meet Week · Reduce Uncertainty
    Day Before · Make Tomorrow Boring
    Day Before · Make Tomorrow Boring
    Meet Day · Execute the Plan
    Meet Day · Execute the Plan
    After the Meet · Review
    After the Meet · Review

    Follow your current event rules and established coaching plan. Checklist completion does not predict your result.

    Powerlifting Meet Prep at a Glance

    Use the timeline as a checklist, not as a rigid program. Your coach, training history, federation and competition schedule may change the details.

    When Main job What should be decided
    8+ weeks out Know the meet Federation, date, division, weight class, travel
    4–6 weeks out Make training competition-specific Commands, depth, pause, equipment, rack setup
    2–3 weeks out Build the meet-day plan Likely opener range, warm-up outline, packing list
    Meet week Reduce uncertainty Final schedule, taper, equipment, bodyweight decision
    Day before Make tomorrow boring Pack, confirm times, charge devices, write down the plan
    Meet day Execute one decision at a time Weigh-in, warm-ups, attempts, commands, recovery between lifts

    The key idea is simple: meet prep should move decisions out of meet day and into the weeks before it.

    What Powerlifting Meet Prep Actually Means

    Powerlifting preparation is broader than peaking strength.

    You need to arrive with enough physical readiness to lift well, but also with a process that survives a long day, unfamiliar equipment, referee commands, changing flight times and the pressure of nine attempts.

    A useful meet-prep plan covers five areas:

    1. Rules and eligibility — what your federation and event actually require.
    2. Competition skill — squat depth, bench commands, deadlift control and legal equipment.
    3. Performance planning — taper, likely attempts and warm-up structure.
    4. Logistics — travel, check-in, weigh-in, food, equipment and timing.
    5. Decision-making — what you will do when an attempt feels better or worse than expected.

    Strength matters. Preparation makes that strength easier to display.

    8+ Weeks Out: Know the Meet Before You Train for It

    The first job is not to pick your opener. It is to understand the competition you entered.

    Confirm:

    • federation and current rulebook,
    • meet date and venue,
    • full power vs single-lift event,
    • raw/classic vs equipped division,
    • age and bodyweight division,
    • registration and membership requirements,
    • weigh-in time and format,
    • equipment approval requirements,
    • travel and accommodation,
    • start time and session information when available.

    If you have not chosen a competition yet, use the Powerlifting Competition Calendar to build a shortlist, then verify the organiser's official source before paying or booking travel. The separate How to Choose a Powerlifting Meet guide covers that decision in more detail.

    Read the rulebook earlier than feels necessary

    Do not wait until meet week to discover that your normal gym setup is not legal in your federation.

    Rules can differ across federations in areas such as:

    • commands,
    • squat depth wording,
    • bench setup,
    • approved equipment,
    • footwear,
    • socks and singlets,
    • weigh-in procedure,
    • attempt changes,
    • timing and cards.

    For example, current IPF and USA Powerlifting rules both define detailed competition and weigh-in procedures, but you should never assume that rules transfer automatically to another federation or national affiliate.

    Treat the rulebook and organiser instructions as the authority. This article is a planning guide around those rules.

    4–6 Weeks Out: Make Training Look More Like Competition

    The closer you get to the meet, the less useful it is to perform lifts that would not count on the platform.

    You do not need every session to become a mock meet. You do want your competition lifts to feel familiar under competition standards.

    Practise commands

    A legal lift is not only about moving the bar.

    Practise waiting for the commands used by your federation. If you have a training partner or coach, let them call commands. If you train alone, use recorded commands or deliberately pause at the required decision points.

    For bench press, use the Powerlifting Bench Press Rules & Command Trainer to compare federation differences and practise the actual command sequence.

    Make squat depth repeatable

    Do not aim to discover your legal depth on the platform.

    Film working sets from a useful side angle and review the relevant hip/knee landmarks. The goal is not to squat dramatically deeper than necessary. It is to make legal depth repeatable without losing balance, brace or bar path.

    Use the Powerlifting Squat Depth Guide and Checker for a visual review. It is a training aid, not an official referee decision.

    Use the equipment you will actually compete in

    Meet week is a poor time to discover that your singlet rubs, your belt setting feels wrong or your shoes change your setup.

    Train enough with your planned:

    • belt,
    • knee sleeves or wraps where permitted,
    • wrist wraps,
    • shoes,
    • singlet,
    • bench shirt/equipped gear where applicable,

    to know how they affect your setup.

    Check approved-equipment requirements if your federation uses them.

    Record rack and bench settings

    If the event uses adjustable racks, record the settings you use in training when possible.

    A simple note can prevent unnecessary guesswork:

    • squat rack height,
    • squat safety height where relevant,
    • bench rack height,
    • preferred handoff notes.

    The exact system depends on the meet equipment, so treat these as starting references rather than guarantees.

    2–3 Weeks Out: Build Your Attempt Plan

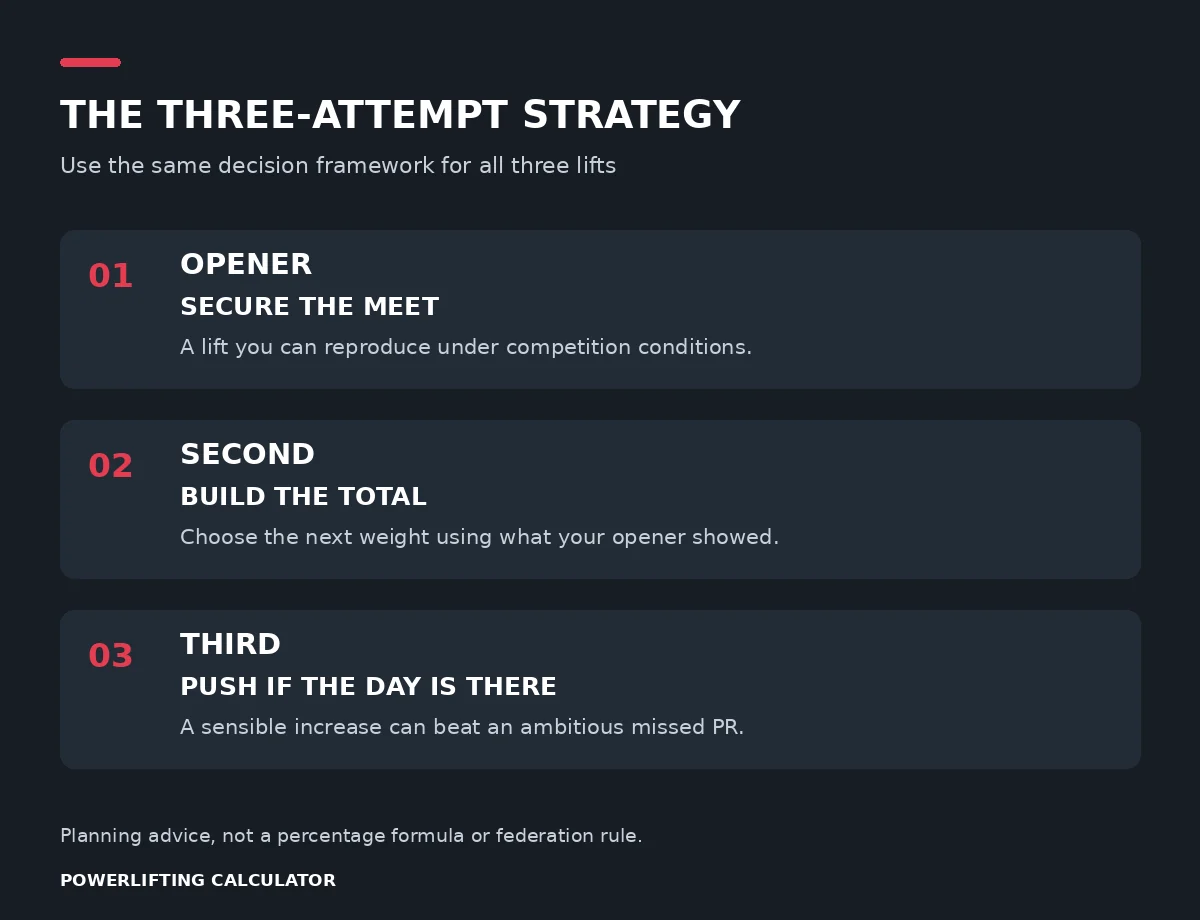
    You do not need to lock all nine attempts weeks in advance. You should have a decision framework before meet day.

    The opener should be supported by recent training evidence and should be a lift you expect to complete to competition standard even when the environment is unfamiliar.

    The second attempt should build the total without removing your options.

    The third attempt should respond to what the second attempt actually told you.

    For the full decision framework, use:

    Do not turn percentages into promises

    A percentage can be useful as a planning reference, but it cannot know:

    • how you slept,
    • how the weight cut affected you,
    • whether your warm-ups were rushed,
    • whether the first attempt was technically clean,
    • how the judges are calling the lift,
    • how the bar moved today.

    Write tentative attempts, then write the condition that would justify changing them.

    For example:

    If the opener is technically clean and clearly submaximal, take the planned second. If it is slower than expected or receives a technical red light, adjust the second before thinking about a PR.

    That is more useful than arriving with three numbers you refuse to change.

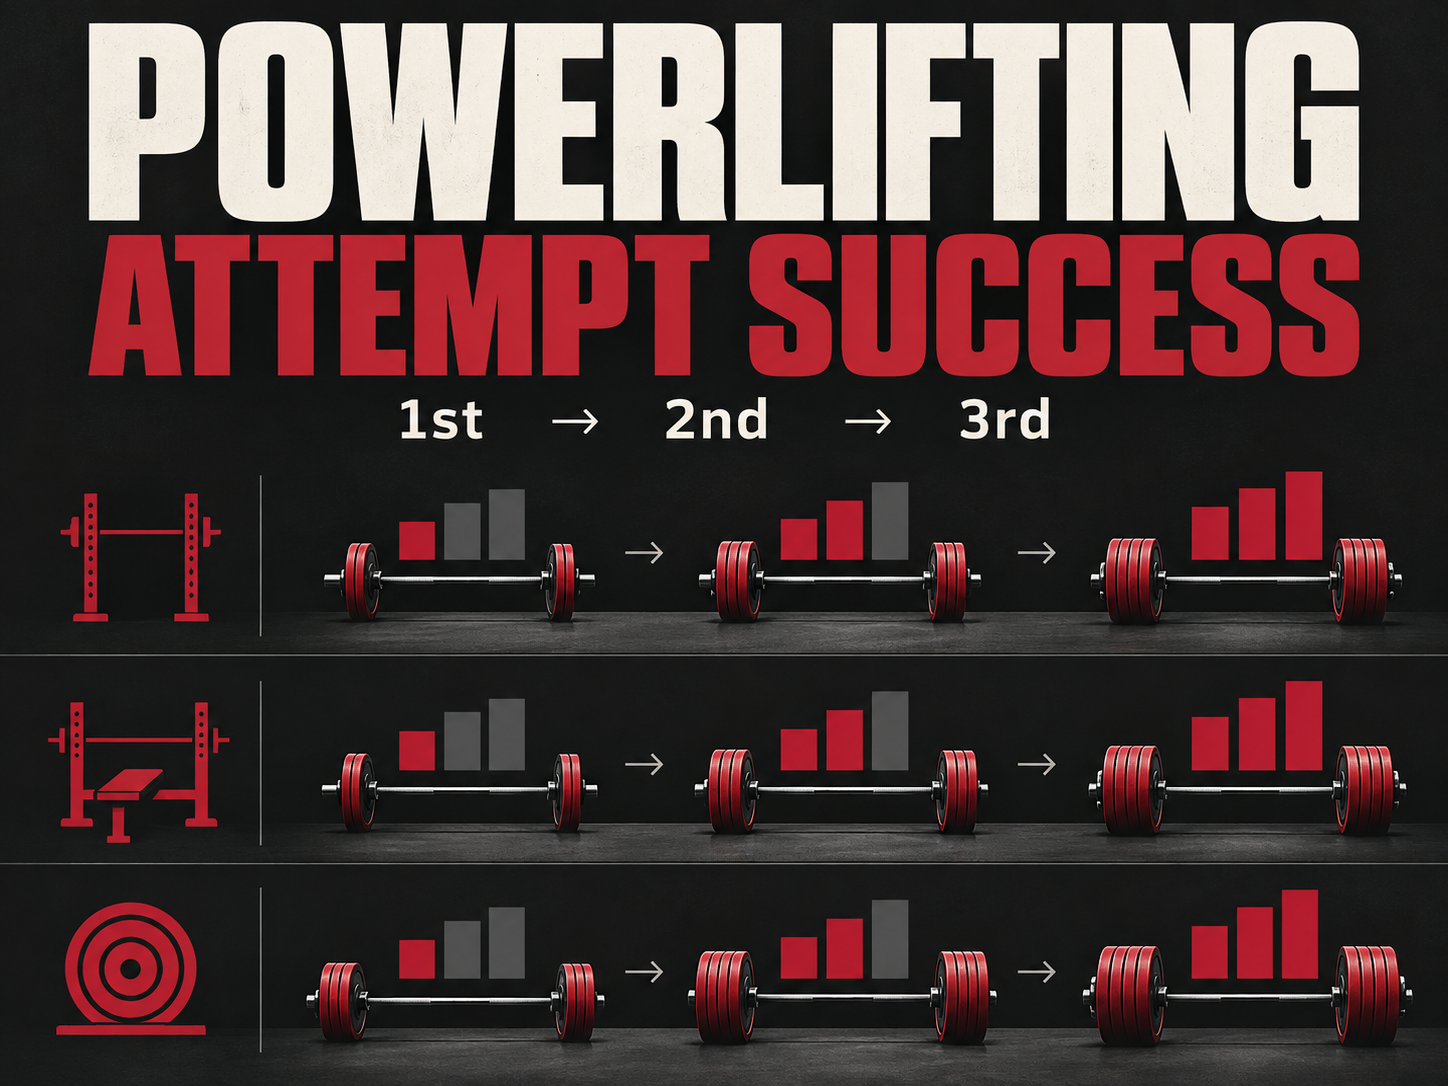
    What Real Competition Data Says About Attempt Success

    Attempt numbers have different jobs, and competition data reflects that.

    The chart below uses Powerlifting Calculator's OpenPowerlifting analysis to show the observed make rate for first, second and third attempts across squat, bench press and deadlift.

    Attempt Success by Attempt Number

    Raw full-power SBD · All included lifters · OpenPowerlifting · Last 3 years
    Data updated: October 11, 2026

    Squat

    #188.4%
    #284.0%
    #366.9%

    Bench Press

    #191.7%
    #281.4%
    #349.3%

    Deadlift

    #195.0%
    #288.5%
    #361.2%
    LiftAttemptRecordedSuccessfulFailedSuccess rate
    Squat1345,397305,34340,05488.4%
    Squat2343,435288,46854,96784.0%
    Squat3338,934226,601112,33366.9%
    Bench Press1344,724316,08628,63891.7%
    Bench Press2342,772278,92863,84481.4%
    Bench Press3337,388166,380171,00849.3%
    Deadlift1343,762326,57917,18395.0%
    Deadlift2340,594301,58439,01088.5%
    Deadlift3335,251205,252129,99961.2%

    Data source: OpenPowerlifting. Analysis generated by Powerlifting Calculator.

    Use this as context, not as a formula for your own attempt percentages.

    A first attempt is normally selected to establish a successful lift and get the lifter on the board. A third attempt is more often where lifters chase a personal record, placing, qualifying total, federation record or the highest total available on the day.

    That difference in purpose matters when reading the chart. A lower observed success rate on later attempts would not automatically mean those attempts were badly chosen. More aggressive attempt selection can be intentional.

    The data also keeps squat, bench press and deadlift separate because the lifts happen at different points in the meet and carry different technical and fatigue demands.

    For methodology, limitations and the full analysis, read How Often Do Powerlifters Make Each Attempt?.

    The chart updates with the analysis pipeline. Its percentages describe recorded attempts in the dataset; they are not your personal odds of success.

    Weight Class and Weigh-In: Decide Early, Not in Panic Mode

    Your weight class affects preparation, but being close to a lower class does not automatically mean you should cut.

    Start by confirming:

    • your federation's actual classes,
    • your registered/nominated class,
    • your normal morning bodyweight trend,
    • the weigh-in window,
    • whether class changes are permitted,
    • what matters most at this meet.

    Use the Powerlifting Weight Class Guide and Weight Class Checker to understand the category structure.

    If you are considering a lower class, the Powerlifting Weight Cut Calculator and Weight-Class Decision Guide can help frame the arithmetic.

    They deliberately do not provide dehydration, sauna, sodium-restriction or water-loading protocols.

    Why the weigh-in window matters

    Recovery time after weighing in differs by federation and event.

    Check the scheduled start and end of weigh-in and the start of lifting in your event information. Read your federation's current rules rather than assuming another meet's recovery window applies.

    That difference matters because a bodyweight strategy that looks manageable with a long recovery period may create a completely different competition-day problem with a short recovery window.

    For a first meet, reducing unnecessary variables is often more valuable than forcing a lower bodyweight class.

    Tapering: Remove Fatigue Without Inventing a New Program

    The final phase before competition is not the time to build new strength.

    A taper generally reduces training stress so the athlete can express existing fitness with less accumulated fatigue. Research specific to powerlifting is more limited than the endurance-sport literature, and reviews of strength-sport tapering do not support one universal protocol that fits every lifter.

    That is important.

    Do not copy a stranger's exact final-week percentages simply because they worked for that lifter.

    A sensible taper should be based on:

    • your normal training structure,
    • how much fatigue you accumulate,
    • how you respond to reduced volume,
    • your coach's plan,
    • the timing of your final heavy exposures,
    • and your competition date.

    The practical meet-prep rule is simpler:

    Do not try to cram fitness into the final week.

    Avoid turning nerves into extra max attempts, extra volume or unfamiliar conditioning. The goal is to arrive ready to perform the lifts you already prepared.

    The 2020 powerlifting taper review describes the limited strength-sport evidence. Use it as background for an established coaching plan, rather than as a universal final-week schedule.

    Meet Week: Reduce Uncertainty, Not Just Training

    By meet week, the major decisions should already exist.

    Your job is to confirm them.

    Meet-week checklist

    • Re-read the event email and current schedule.
    • Confirm the venue and parking/travel route.
    • Confirm weigh-in and lifting times.
    • Check membership/ID requirements.
    • Confirm your equipment.
    • Review commands.
    • Confirm your bodyweight plan.
    • Write down tentative openers.
    • Write down a warm-up outline.
    • Charge your phone and any headphones/device you rely on.
    • Decide what food and fluids you will bring.
    • Know who will handle you, if anyone.
    • Know how you will record or review attempts if you want video.

    Do not introduce avoidable novelty.

    That means meet week is usually a poor time for:

    • new shoes,
    • a new belt setting,
    • a new pre-workout,
    • a new food strategy,
    • a new warm-up sequence,
    • a last-minute technique overhaul,
    • an unplanned max attempt.

    Familiar and boring is useful.

    What to Pack for a Powerlifting Meet

    Your exact list depends on federation rules and personal preferences, but the categories are predictable.

    Competition equipment

    • singlet,
    • approved shirt where required,
    • socks,
    • lifting shoes,
    • belt,
    • wrist wraps,
    • knee sleeves/wraps where applicable,
    • deadlift socks where required,
    • underwear that complies with the rules,
    • any approved equipped lifting gear.

    Documents and meet information

    • photo ID,
    • membership information,
    • entry confirmation,
    • event schedule,
    • rulebook link or saved reference,
    • rack settings if known,
    • written attempt/warm-up plan.

    Long-day essentials

    • normal food you already tolerate,
    • drinks,
    • basic hygiene items,
    • layers/comfortable clothing between lifts,
    • phone charger/power bank,
    • small bag for platform equipment,
    • anything your organiser specifically requires.

    For a printable version, use the free First Powerlifting Meet Checklist. It includes packing lists, a warm-up worksheet and a nine-attempt meet card.

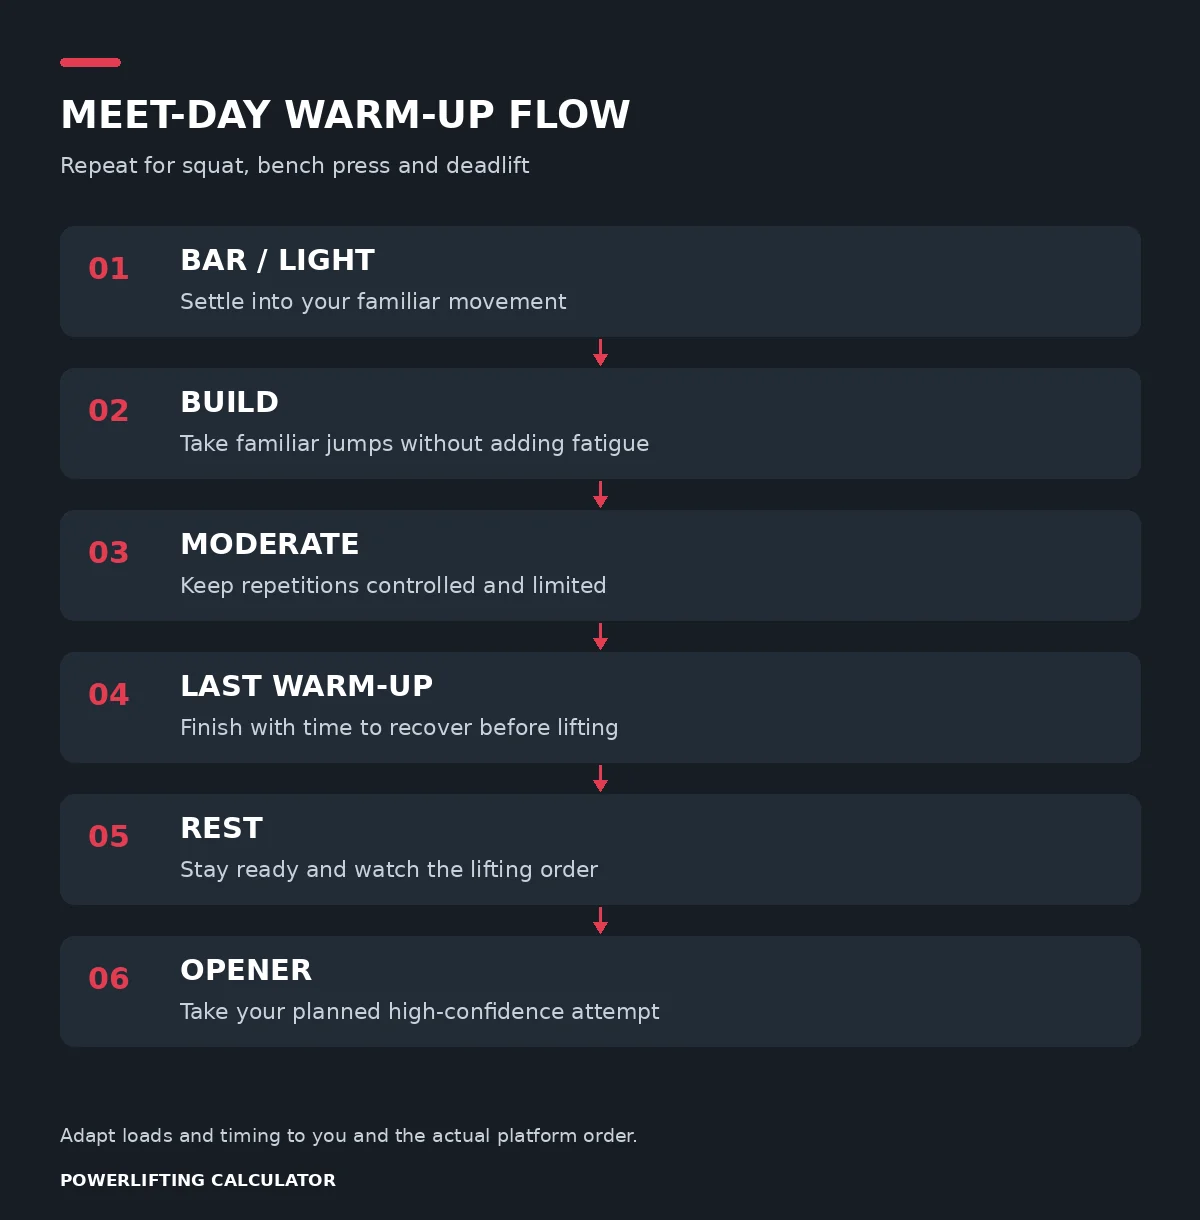
    Plan Your Warm-Ups Before You Arrive

    Warm-ups should prepare you for the opener without becoming another workout.

    There is no universal percentage ladder or exact clock that works at every meet because the timing depends on:

    • flight size,
    • lifter order,
    • loading speed,
    • equipment availability,
    • how many warm-up stations exist,
    • whether the schedule is ahead or behind,
    • your normal warm-up needs.

    Build the warm-up backward

    A useful planning process is:

    1. Know the opener.
    2. Know the last warm-up you normally need before that opener.
    3. Estimate how long you want between your last warm-up and the platform.
    4. Work backward through the previous warm-ups.
    5. Adjust to the real flight, not only the printed schedule.

    Your warm-up plan should include fewer decisions, not more complexity.

    A written plan might have:

    • exercise,
    • load,
    • approximate order,
    • optional small adjustment,
    • last warm-up target.

    If the room is chaotic, ask your handler, coach or an experienced meet official for timing context rather than blindly following the clock.

    The First Powerlifting Meet Guide explains the broader competition flow, while the free checklist and paid Playbook provide dedicated warm-up worksheets.

    Warm-Up Room Etiquette: Make the Room Easier for Everyone

    The warm-up room is shared space, not a private training station.

    A few habits make the entire flight run more smoothly:

    • Share racks and platforms instead of treating one station as yours.
    • Tell the group what weight you need next so loading can be coordinated.
    • Help load and unload when practical.
    • Keep bags, plates and loose equipment out of walkways.
    • Know roughly where your flight is in the running order.
    • Avoid turning warm-ups into extra max attempts that slow everyone down.
    • Ask before changing a rack setting that another lifter is actively using.

    Good warm-up-room etiquette is not complicated. Communicate, share equipment and remember that everyone else is trying to time a competition warm-up too.

    Day Before the Meet: Make Tomorrow Boring

    The day before the meet is mostly an organisation day.

    Do the things that make it difficult to forget something when you are tired or nervous.

    Final day-before tasks

    • Pack the complete bag.
    • Put documents/ID where you cannot forget them.
    • Confirm travel time.
    • Set alarms.
    • Check the latest organiser message.
    • Review the federation commands once.
    • Confirm tentative openers and warm-ups.
    • Confirm your bodyweight situation without panic.
    • Eat and drink according to a familiar plan.
    • Avoid turning "feeling good" into a surprise max-out.

    If you are travelling, build in more time than a normal commute. Arriving rushed is an avoidable stressor.

    Meet Day: From Weigh-In to Final Deadlift

    The exact administration order varies, but a full-power meet usually follows the same broad arc:

    1. Arrival / check-in
    2. Equipment or rack-setting procedures where applicable
    3. Weigh-in
    4. Recovery / preparation
    5. Squat warm-up
    6. Squat attempts
    7. Bench warm-up
    8. Bench attempts
    9. Deadlift warm-up
    10. Deadlift attempts
    11. Final total and post-meet review

    Follow the organiser's real schedule and announcements rather than forcing this sequence onto every federation.

    Treat the meet as nine separate decisions

    Do not carry the third deadlift in your head while you are waiting for the squat command.

    On each attempt:

    1. Know the weight.
    2. Know the command/cue.
    3. Complete the attempt.
    4. Read the result and lights.
    5. Decide the next attempt.
    6. Then move on.

    This protects you from letting one mistake infect the rest of the day.

    If You Do Not Have a Handler

    Many lifters compete without a coach or dedicated handler. That does not mean the meet has to feel chaotic, but your system should become simpler, not more complicated.

    If you are handling yourself:

    • Keep your tentative attempts and warm-ups written down somewhere you can access quickly.
    • Know where the running order or flight information is displayed.
    • Ask an official or experienced lifter if you are unsure how quickly the flight is moving.
    • Keep track of when your next attempt must be submitted according to the rules of your federation.
    • After each attempt, check the result/lights before deciding the next weight.
    • Keep your platform equipment together in one small, easy-to-grab bag.
    • Do not rely on your phone as the only copy of the plan; battery, signal and distractions are avoidable failure points.

    Solo meet-day rule: If nobody is managing the day for you, make the plan simpler — not more detailed.

    Your Nine Attempts Need a Plan — and a Backup Plan

    A meet plan should be conditional.

    For each lift, write:

    • tentative opener,
    • tentative second,
    • tentative third range,
    • what earns the bigger third,
    • what you do after a technical miss,
    • what you do after a strength miss.

    If the opener goes well

    A clean, confident opener gives you options.

    Do not automatically turn that into the largest possible jump. Use the second attempt to build the total and gather another piece of evidence about readiness.

    If the opener is slower than expected

    A slow opener does not automatically mean disaster.

    Check:

    • Was the lift technically clean?
    • Was it a timing/command issue?
    • Was the warm-up rushed?
    • Was the weight simply heavier than expected?

    Then adjust.

    If you miss an attempt

    Separate why you missed from how much you missed.

    A technical red light on a weight you were strong enough to lift is a different problem from a bar that stopped.

    Do not make the next call only from emotion.

    For deeper examples, use the Attempt Selection Guide.

    When the Plan Breaks: Meet-Day Contingencies

    A good plan is useful. A good plan with simple backup decisions is better.

    Meet day can run late, speed up unexpectedly, crowd the warm-up room or expose a technical problem you did not expect. The goal is not to predict every problem. It is to avoid making a small disruption worse.

    Situation First response What not to do
    Meet is running 20–30 minutes late Slow the warm-up progression, stay warm and keep the final warm-ups aligned with the real flight Keep taking extra heavy warm-ups just to fill time
    Flight is moving faster than expected Compress the early warm-ups and protect the most important final warm-up Panic and jump straight to a near-opener without context
    Opener gets red lights for a command/technical issue Identify the technical reason first and correct it on the next attempt Add weight automatically because the bar felt easy
    Opener is much slower than expected Reduce the planned second-attempt jump and preserve the total Chase the pre-written second attempt at all costs
    Warm-up room is crowded Communicate, share racks and coordinate loading with the group Wait silently until your timing is already lost
    Equipment or rack-setting issue appears Tell the handler or meet official early and use the event's proper procedure Improvise a platform solution at the last second
    Bodyweight is not where expected Follow the event/federation procedure and protect performance Start an emergency dehydration or weight-loss experiment
    A previous attempt went badly Separate the technical/strength problem, make the next decision, then move on Let one miss change every remaining decision emotionally

    The common theme is protect the next useful decision.

    Do not solve a timing problem with extra fatigue. Do not solve a technical problem by automatically adding weight. Do not solve a bodyweight surprise with an unplanned acute cut.

    If the event's rules or officials require a different procedure, the official procedure wins.

    Common Powerlifting Meet-Prep Mistakes

    1. Treating the opener like a test of strength

    The opener's job is to start the meet with a successful competition-standard lift and useful information.

    An opener that already requires a perfect day leaves little room for the rest of the attempt plan.

    2. Practising commands for the first time on meet day

    A lift can be physically strong and still receive red lights for a command or technical error.

    Make commands boring in training.

    3. Discovering your federation's rules too late

    Rules around equipment, bench setup, depth and weigh-in are not universal.

    Read the current rulebook before the final week.

    4. Making a last-minute weight-class decision

    Bodyweight panic competes with performance preparation for attention.

    Decide early enough to avoid turning meet week into an emergency.

    5. Using a warm-up plan that ignores the flight

    A perfect spreadsheet is useless if the flight moves faster or slower than expected.

    Plan the structure, then adapt to the room.

    6. Trying new equipment, food or supplements

    Meet day is already full of variables.

    Do not add avoidable ones.

    7. Having numbers but no decision rules

    Three written attempts are not a strategy if you do not know what would make you change them.

    Write the "if this, then that" decisions before the meet.

    8. Forgetting the meet continues after a mistake

    One miss does not define the day unless you let it.

    Reset the next decision.

    48-Hour Powerlifting Meet Prep Check

    Use this as the final quick review.

    Rules and logistics

    • I know the current meet schedule.
    • I know the weigh-in time and location.
    • I have the required ID/membership information.
    • I know my federation's commands.
    • I know how I am getting to the venue.

    Equipment

    • Singlet and required clothing packed.
    • Shoes packed.
    • Belt/wraps/sleeves packed where applicable.
    • Backup small items packed where useful.
    • Rack settings written down if known.

    Performance plan

    • Tentative squat opener written.
    • Tentative bench opener written.
    • Tentative deadlift opener written.
    • Warm-up outline written for all three lifts.
    • I know what would make me change a second or third attempt.

    Meet-day basics

    • Familiar food/drinks packed.
    • Phone charged.
    • Charger/power bank packed.
    • Travel alarm set.
    • I am not relying on memory for the important parts of the plan.

    If you want the printable version, download the Free First Powerlifting Meet Checklist.

    After the Meet: Review Before You Forget

    Meet prep does not end with the final deadlift.

    The competition gives you information that a normal training day cannot.

    Within a day or two, record:

    • all nine attempts,
    • white/red light patterns,
    • command mistakes,
    • how warm-ups felt,
    • whether timing worked,
    • whether the opener choices were right,
    • what changed after the second attempts,
    • how equipment felt,
    • how bodyweight/weigh-in affected the day,
    • the one or two priorities for the next meet.

    Do not reduce the review to "PR or no PR."

    A meet where you learn how to handle commands, warm-ups and attempt calls can improve the next competition even if the total was not what you wanted.

    The paid Powerlifting Meet Day Playbook includes reusable preparation, warm-up, attempt and post-meet review worksheets for lifters who want the full written system.

    Powerlifting Meet Prep FAQ

    How far out should I start preparing for a powerlifting meet?

    Meet preparation starts as soon as the event is chosen because federation rules, travel, bodyweight class and competition standards can affect training decisions. This guide uses an 8+ week planning window as an organisational framework, not as a universal training program.

    What should I do the week before a powerlifting meet?

    Use meet week to reduce uncertainty. Confirm the schedule, rules, equipment, bodyweight plan, openers, warm-ups, travel and packing. Follow your established taper rather than adding unplanned heavy work or new routines.

    Should I max out before a powerlifting meet?

    A last-minute max is usually poor meet preparation because it adds fatigue and risk without building meaningful new strength before competition. Follow your established training/taper plan instead of testing fitness simply because the meet is close.

    How should I choose my opening attempts?

    Base openers on recent successful competition-standard training, not on the biggest number you hope to lift. The opener should give you a high-confidence start and useful information for the second attempt. Use the Powerlifting Attempt Selection guide and Attempt Planner for the full framework.

    Should I cut weight for my first powerlifting meet?

    A weight cut is not required. For many first-time lifters, competing near normal bodyweight removes an extra variable while they learn commands, timing and attempt selection. If you are considering a lower class, verify the federation's weigh-in rules and use appropriate professional guidance rather than following an acute dehydration protocol online.

    What should I bring to a powerlifting meet?

    Bring the competition clothing and equipment required by your federation, ID/membership documents, your written attempt and warm-up plan, familiar food/drinks and normal long-day essentials. Use the free printable First Powerlifting Meet Checklist for a detailed packing list.

    How do I practise powerlifting commands?

    Use the commands required by your federation during competition-style training reps. A coach or training partner can call them, and the Bench Press Command Trainer can help practise bench timing. Always check the current federation rulebook because commands and technical rules can differ.

    How do I know when to start warming up?

    Work backward from your opener and expected flight position using your normal warm-up needs. The exact timing depends on flight size and meet pace, so adapt to the real room rather than relying on one fixed minute-by-minute schedule.

    Your Meet Prep Plan

    Good meet prep does not guarantee nine successful attempts.

    It does something more useful: it removes problems that did not need to exist.

    Know the rules. Practise the competition version of the lifts. Decide your bodyweight strategy early. Write down attempts and warm-ups. Pack before you are tired. Then let meet day be a sequence of simple decisions instead of a pile of surprises.

    Use these tools next

    Sources and Review

    Prepared by Powerlifting Calculator. Sources and links checked on 11 October 2026.

  • Powerlifting Squat Depth: Rules, Examples & How to Check Your Squat

    Powerlifting Squat Depth: Rules, Examples & How to Check Your Squat

    A squat can feel deep, look convincing from the front and get a confident “good” from your training partners. Then meet day comes and the same movement gets red lights. Powerlifting squat depth depends on specific anatomical landmarks, rather than how hard the rep felt or how low the bar travelled.

    This guide explains the reference points, shows high, borderline and clear depth, and gives you a practical way to review your own footage. The checker below compares points you select in an image; it cannot judge a competition attempt.

    The IPF describes the top surface of the legs at the hip joint descending lower than the top of the knees. USA Powerlifting is more anatomically explicit: its reference is the top/anterior surface at the hip joint, identified as the inguinal crease. The cited WPC document uses the top surface at the hip joint and the top of the knees. See the source versions and limitations below.

    For a useful training review, identify the hip-side reference on the upper/front surface of the thigh where it meets the torso. Compare it with the top of the knee on the same visible side. Do not mark the centre of the hip joint, the lowest part of the buttocks, the middle of the kneecap, the belt, or an arbitrary fold in your shorts.

    The practical target is for that hip-side reference to be visibly lower than the top of the knee. Not exactly level. Not “close enough to parallel.” Below. There is no universal centimetre or pixel allowance in these depth definitions.

    Why “Parallel” Is a Misleading Term

    “Parallel” is gym shorthand. One person means the femur looks horizontal; another watches the top of the thigh; a third watches its underside. Others mistake a forward-leaning torso for a deep squat. Those observations can describe different positions in the same rep.

    When someone calls a powerlifting parallel squat “good,” ask which landmarks they compared. The question is not whether some part of the thigh looks horizontal. It is whether the rulebook’s hip reference descended below the knee reference.

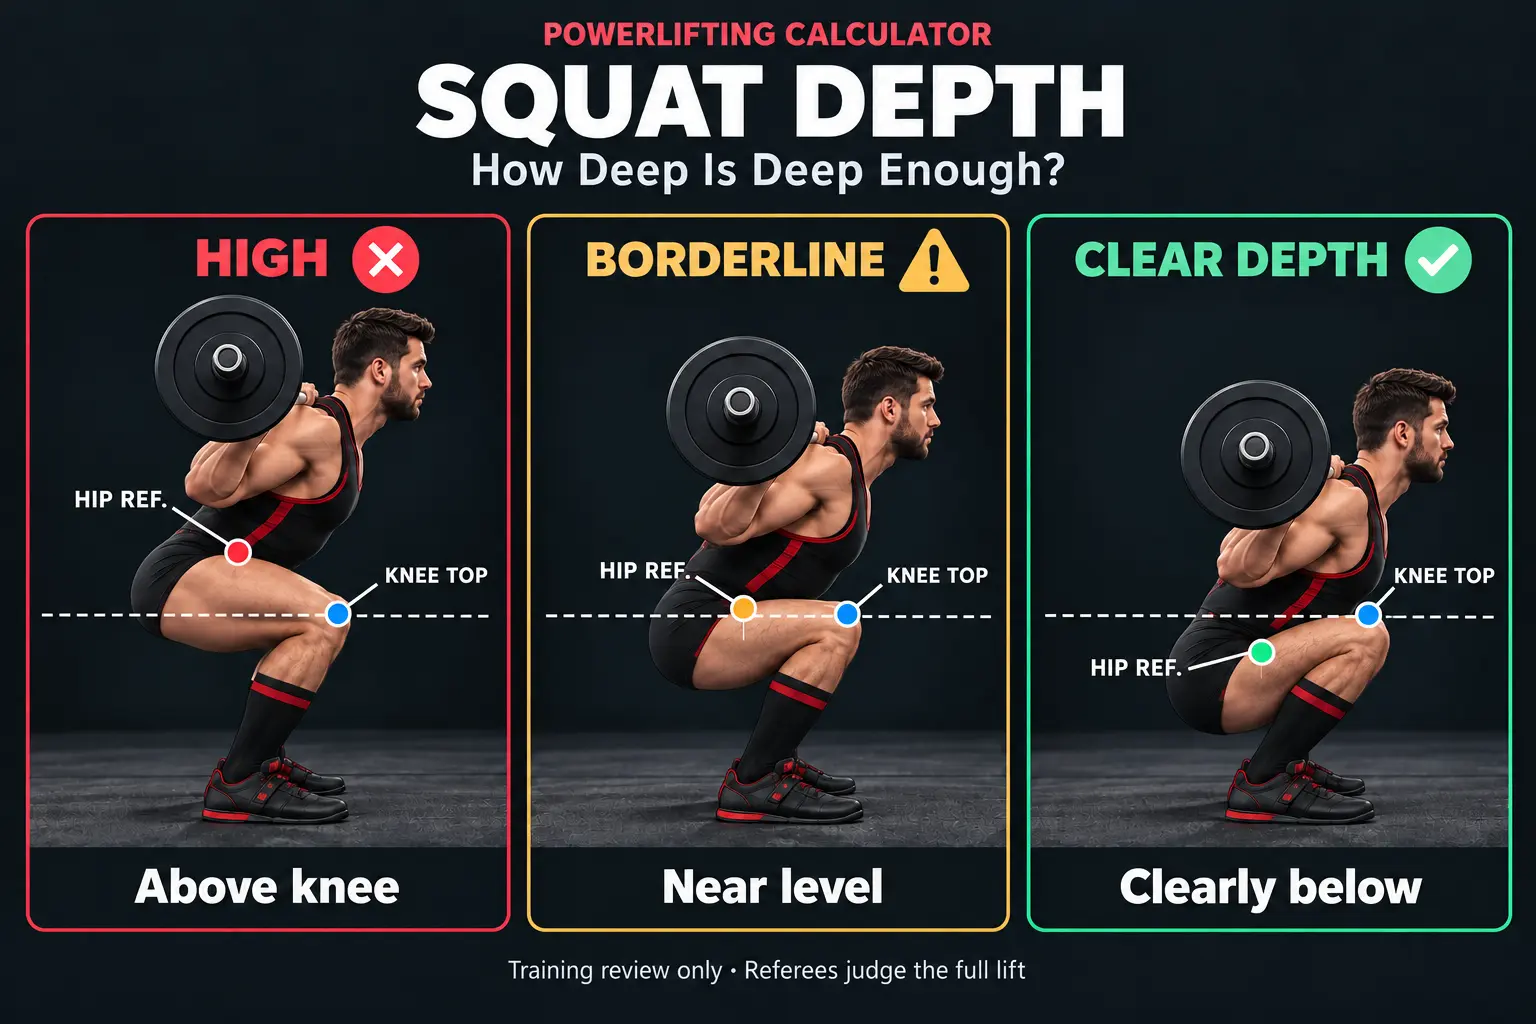
    High vs Borderline vs Clear Depth

    Illustrated powerlifter in three squat positions: hip reference above, near level with, and below the knee reference line. Training examples only.
    Illustrative training examples. The dashed line passes through the knee reference; the hip mark illustrates the upper thigh reference at the hip. Camera angle and landmark placement matter. Referees judge the full lift.
    • HIGH ✕: The hip reference is above the knee reference. A hard rep or a low-looking torso does not change that relationship.
    • BORDERLINE ⚠: The landmarks look approximately level or are too close to separate confidently. Do not automatically count this as a legal lift.
    • CLEAR DEPTH ✓: The hip reference is visibly below the knee reference in the view being reviewed. You still need the other requirements of a legal squat.

    Build a small repeatable depth margin. The illustrations exaggerate the differences to make the idea clear; they do not prescribe an official minimum extra distance.

    Why Camera Angle Can Lie

    A camera above the athlete looks down across the thigh. A camera close to the floor looks up. Filming far in front of or behind the athlete changes which surface you can see. A wide-angle phone lens, especially close to the lifter, can further distort proportions. Camera tilt also makes an on-screen horizontal line a poor substitute for the actual level platform.

    For training footage, record approximately at hip height, from the side or slightly forward of the side. Keep the phone level, stand far enough back to avoid an extreme wide-angle view and include the entire athlete. Keep both landmarks unobstructed. Use the same setup across sessions so comparisons are useful.

    This filming recommendation does not specify where competition referees should sit. Their positioning follows their federation’s rules. A phone view and a referee’s live view are not interchangeable, and neither extra zoom nor a line overlay corrects perspective.

    How to Check Your Own Squat Depth

    1. Record a heavy squat you would use for competition preparation. Include the descent, bottom and recovery. Review warm-ups too, but do not assume their depth carries over to heavier attempts.
    2. Pause at the deepest position. Step through the neighbouring frames so you do not select one just before the bottom.
    3. Identify the top of the knee. Use the upper knee surface, rather than its centre or the top of a sleeve.
    4. Identify the hip reference. Find the upper/front thigh surface at the hip, rather than clothing or the rear of the pelvis.
    5. Visualise a horizontal knee line. Use a level, useful camera view and the same visible side for both marks.
    6. Compare the vertical positions. If the hip is near level, improve your filming and build a little more depth margin.

    If you need extreme zoom, multiple angles and a long debate to prove it was legal, build a little more depth margin. If the landmark is hidden, use a better recording rather than guessing its position.

    Check Your Squat Depth

    Not sure whether your squat is clearly below parallel? Use the Squat Depth Checker to compare your marked hip and knee positions at the bottom. It measures the image you supply, not your anatomy or the federation’s verdict.

    TRAINING REVIEW · LOCAL IMAGE

    Squat Depth Checker

    Select a bottom-position screenshot, then mark the top of the knee and the top surface of the leg at the hip joint, on the same visible side. A clothing fold, belt edge or knee centre is not the reference.

    The Squat Depth Checker does not determine whether a competition lift is officially good or bad. Final decisions are made by referees under the rules of the federation running the meet.

    JPG, PNG or WebP · up to 20 MB · choose a still image with both landmarks visible.

    Upload an image to begin.

    Tap to place a point. Use the adjustment buttons for precision, or focus the image and use Enter / arrow keys. Mark Knee and Mark Hip let you replace either point.

    No image selected. No depth comparison yet.

    Your image is processed locally in your browser and is not uploaded to our server. The checker does not save it.

    How the comparison works

    The tool compares your two manually selected vertical positions. The borderline band is ±3% of the image-space distance between the knee and hip marks. Both distance and vertical separation use original-image coordinates; resizing the display does not change the result. This is an illustrative uncertainty band, not a federation tolerance, a validated biomechanical measurement, or a guarantee of legal depth. Cropping around the athlete is helpful. Camera tilt, perspective, hidden landmarks and your point placement can overwhelm this band. Nearly coincident points cannot be compared. A static image cannot assess commands or the full lift.

    The Biggest Mistake: Training to the Absolute Minimum

    At light weights you may descend comfortably below the reference. At 95%, you may cut the last part of the descent as the load feels heavier, the brace becomes harder to maintain or confidence drops. Fatigue can also change how you reach the bottom. These are reasons to review your own heavy footage, not claims that every lifter gets shallower under load.

    If your training target is exactly the boundary, a small change can leave the next rep high. Aim slightly deeper than minimum legal depth while retaining your brace, balance and normal recovery. You do not have to chase an unnecessarily “ass-to-grass” squat.

    Why Heavy Squats Can Become Higher

    Compare your working sets around 80% with your heavier singles and last warm-up. Does your stance change? Do the knees stop travelling earlier? Do you rush the reversal, or lean forward without actually lowering the hip reference? A change in descent rhythm can be easy to miss when all your attention is on standing up.

    Review your last warm-up, planned opener and meet-style singles, rather than testing 100% merely for a depth check. Use the 1RM Percentage Calculator to understand loads within your existing programme. If depth deteriorates, work with your coach on a load and technique you can repeat.

    High-Bar vs Low-Bar: Judge the Landmarks

    High-bar squats often look more upright; low-bar squats often involve more torso lean and a different distribution of hip and knee movement. Individual proportions and technique matter, so neither appearance is universal. A forward lean does not prove depth, and an upright torso does not guarantee it.

    The relevant depth requirement still applies. Use your actual competition bar position when practising. Bar placement itself also has federation rules: for example, the 2026 IPF rules specify a lower placement limit at posterior-deltoid level. Do not treat “low-bar” as permission for any placement.

    Does Stance Affect Depth?

    Yes: stance width and toe angle influence how you reach the bottom. Hip anatomy, femur length, ankle mobility, footwear and bar position also influence the available movement and its appearance. There is no single stance that makes every lifter strongest at clear depth.

    Change one variable at a time during planned training. Film the result, check the same landmarks and see whether you can maintain balance and a repeatable descent. A wider stance does not relax the depth rule. Neither does changing shoes or wearing equipment.

    Can You Squat Too Deep?

    Extra depth itself is not listed as a depth failure in the verified squat sections. Performance is a different question: travelling farther than necessary adds range of motion, and some lifters lose their best position if they chase maximum depth. Others lift well from a deeper bottom.

    The useful target is clearly below, repeatable and strong. Choose a bottom position you can control under your meet loads. Going deeper does not excuse a double bounce, a lost finish or any other rule violation.

    Squat Depth Is Only One Part of a Legal Squat

    In the verified IPF, USA Powerlifting and cited WPC texts, the squat uses SQUAT → RACK signals. Establish the required upright, controlled position with locked knees, wait for SQUAT, complete the descent and recover to the required finish, then wait for RACK.

    Those texts also prohibit double bouncing or repeated recovery attempts, and stepping or resetting the feet during the lift. IPF describes downward movement during ascent; USA Powerlifting specifically refers to downward movement of the whole bar in its entirety. WPC allows a stop but no downward motion during recovery. Their detailed failure lists differ, including contact and returning the bar to the rack. Read the actual section for your event; confirm WUAP’s current commands and failure criteria in its current book.

    A bottom-position screenshot cannot assess any of these. A clear result from the checker means only that your selected points have a clear vertical separation in that image.

    How to Practice for Meet Day

    Use your competition stance, shoes and bar position. Ask a training partner to give the signals, then film your planned opener and other appropriate meet-style work. Review the full rep as well as the bottom frame. Practice holding the finished position instead of walking toward the rack as soon as the weight comes up.

    Repeatability beats occasional extreme depth. Review several reps across sessions; one deep rep does not establish a reliable opener. If you regularly need to ask whether the squat was deep enough, make the next rep slightly deeper while maintaining control.

    Choose an opener you can execute to clear depth under commands, even when the platform feels unfamiliar. Our Powerlifting Attempt Selection Guide explains how to choose your opener, second and third attempts. Use the Attempt Planner to record that plan and the Plate Loading Calculator for warm-up loading.

    Squat Depth Checklist

    • Can I reach the required depth with my heavy competition-preparation loads?
    • Does my depth stay consistent across reps and sessions?
    • Have I filmed from a level, useful angle with both landmarks visible?
    • Can I maintain my brace and balance at that depth?
    • Do I know my federation’s commands and other squat requirements?
    • Can I finish with locked knees and wait without rushing the rack signal?

    Squat Depth by Federation

    Source check: 10 October 2026. The wording below is paraphrased. “Hip crease below knee” is useful shorthand, but the federation’s own anatomical wording remains the reference.

    Depth rules and source limitations
    FederationDepth standardRelevant notesOfficial source
    IPFUpper leg surface at the hip joint lower than the knee tops.Level does not meet the stated lower-than requirement. Classic and equipped use the squat performance section.2026 Technical Rulebook v3, effective 1 March 2026, §§4.1–4.1.1.
    USA PowerliftingTop/anterior upper leg surface at the hip joint lower than the knee’s top surface.Explicitly identifies the hip reference as the inguinal crease. This book covers national/pro and lower-level USAPL events; it does not govern IDFPA international events.Rulebook v2026.2, updated 9 February 2026; in effect 1 January 2026, §§4.1–4.2.
    WUAPCurrent international depth wording could not be independently re-read during this update.The official site lists v3.5, dated 1 March 2026. Its hosted document was inaccessible for this audit. Confirm the exact wording and national variations with the federation; do not assume another federation’s text is identical.Official WUAP site: Documents / Rulebook v3.5.
    WPCThe cited book requires the upper leg surface at the hip joint below the knee tops.Verified in the accessible 2021 Edition, not certified as a fully current 2026 consolidated book. The legacy download on the rules page did not resolve.Official Rule Book, 2021 Edition, Squat §3 and disqualification §5; check official updates.

    Before entering: Confirm the book and any applicable national or meet-specific instructions. A shared below-knee principle does not make every setup rule, command detail or judging procedure identical.

    Squat Depth FAQ

    Does your hip crease have to go below your knee?

    USA Powerlifting explicitly names the inguinal crease as its hip reference. IPF and the cited WPC book describe the upper leg surface at the hip joint. Compare that reference with the knee’s top, not its centre. Check your federation’s wording.

    Is parallel enough in powerlifting?

    Not if “parallel” means the relevant landmarks are level. The verified definitions require the hip reference to be lower. A horizontal-looking femur or thigh underside is not a substitute for that comparison.

    How deep should I squat in training?

    For competition practice, aim for a small, repeatable margin below the required reference while preserving your strong position. Review heavy work and commands, rather than relying only on deep light warm-ups.

    Does squat depth change between raw and equipped?

    The verified squat sections do not offer a shallower depth standard simply because you wear supportive equipment. Equipment can change how you reach the bottom or hide landmarks. Confirm your federation and division’s current rules.

    Can a video prove the referee was wrong?

    A useful video may inform a review, but a phone screenshot or this checker does not reverse a decision. IPF’s 2026 book describes jury-controlled instant replay procedures. Follow the applicable federation’s protest and review process, rather than treating a social-media line overlay as an official ruling.

    Can you squat too deep?

    Extra depth is not itself a depth failure in the verified sections. It may be inefficient for your technique, and other faults can still invalidate the lift. Aim for a clearly legal, controlled and repeatable position.

    Does stance width change legal depth?

    No. It changes the movement and the view of it, not the required landmark relationship. A wide stance, low-bar technique or equipped suit does not grant a higher depth boundary.

    Your Training Target: Clearly Below, Repeatable, Strong

    Do not chase maximum possible depth or live exactly on the borderline. Find the hip and knee references, review heavy work from a useful angle and practise a small margin you can reproduce. Then complete the rest of the lift under your federation’s rules.

    Preparing for a Powerlifting Meet?

    Squat depth is only one part of getting three white lights. Learn the bench commands and common red-light mistakes in our Powerlifting Bench Press Rules & Command Trainer. Then use the Attempt Selection Guide to plan your three attempts.

    New to competition? Read the First Powerlifting Meet Guide and use its preparation steps alongside this depth checklist.

    Powerlifting Rules

    More federation comparisons will join this Rules Hub as new guides are published.

    Official Sources and Verification Notes

    • IPF Technical Rules index and the v3 PDF linked above: squat §§4.1–4.1.1 and jury/replay procedures.
    • USA Powerlifting Rulebook index and v2026.2 linked above: squat §§4.1–4.2. The separately linked 2026 supplement could not be read in this audit; event-specific updates should be checked with USAPL.
    • WUAP official site lists international Rules v3.5, 1 March 2026. Current squat text remains unverified here because its linked file was inaccessible. We have not substituted an older or national book as the current international standard.
    • WPC Official Rules index, its accessible 2021 Edition PDF, and Rules/Organization Updates. The updates page displayed historical entries; it does not establish that the 2021 PDF contains every current change.

    This guide separates verified rules from practical training suggestions. The live federation rules and authorised officials determine competition results. The checker is a manually marked image comparison, with no AI judging or automatic anatomy detection.

  • Powerlifting Bench Press Rules: Commands & Federation Differences

    Powerlifting Bench Press Rules: Commands & Federation Differences

    A competition bench press is more than pressing the weight. You also have to obey the referee commands, maintain the legal setup for your federation, show a motionless bar when required and finish the lift under control.

    The problem is that bench press rules are not identical across federations. A setup that is legal in WUAP or WPC may fail in IPF, and even federations using the same three commands can differ on head position, feet, grip and range of motion.

    Check Your Federation’s Bench Press Rules

    Select your federation below for a practical rules summary.

    FEDERATION COMPARISON

    Bench Press Rule Checker

    Choose a federation to see the commands, setup rules and common red-light causes.

    IPF · USA Powerlifting · WUAP · WPC
    IPF Technical Rulebook, effective 1 March 2026, v3 Verified 2026-10-09
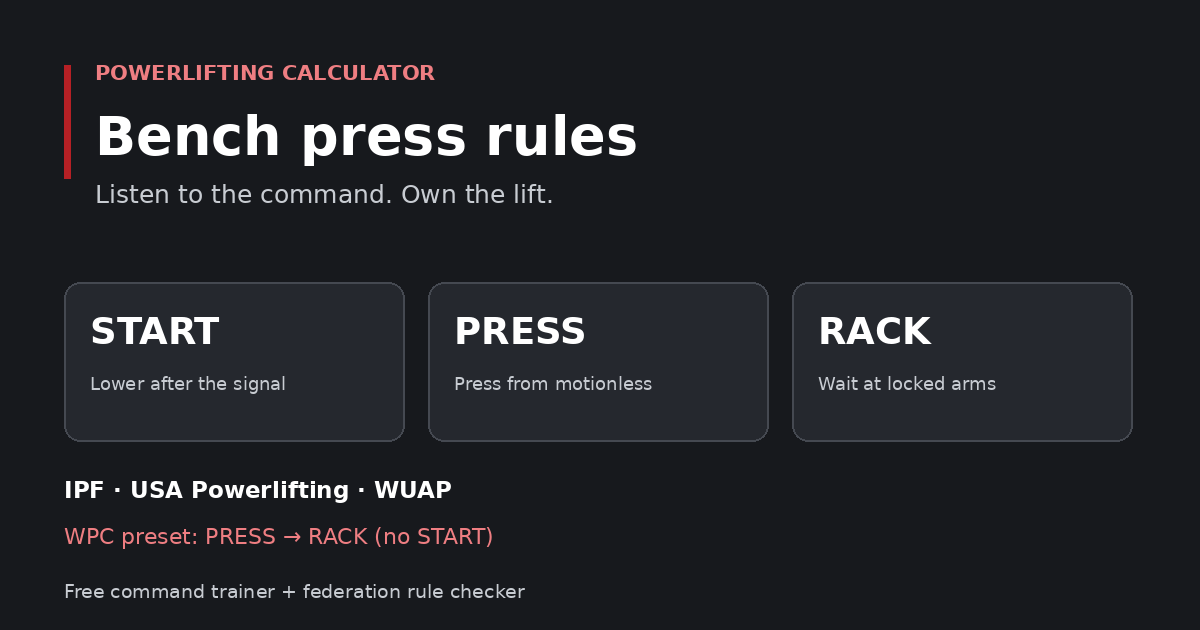
    Competition commands START → PRESS → RACK

    Head

    Head, shoulders and buttocks must remain in contact with the bench.

    Shoulders

    Shoulders must remain in contact with the bench.

    Buttocks

    Buttocks must remain in contact with the bench.

    Feet

    Feet must remain flat on the floor/platform, as flat as the shoe shape allows. Foot movement is permitted only while the feet remain flat.

    Grip width

    Maximum 81 cm between the forefingers. Thumb-around grip required.

    Reverse grip

    Not allowed.

    Pause / PRESS

    The bar must be motionless on the chest or abdominal area before PRESS.

    Range of motion

    The underside of both elbow joints must reach level with or below the top surface of the respective shoulder joints.

    Bar path

    After PRESS, return the bar to locked elbows. Downward movement of the whole bar is not allowed.

    Finish / RACK

    Hold the finished position motionless until the audible RACK command.

    Common reasons for a failed bench

    • Missing or ignoring START, PRESS or RACK.
    • Head, shoulders or buttocks losing contact with the bench.
    • Feet no longer remaining flat.
    • Failure to meet the elbow-depth requirement.
    • Heaving or sinking the bar after PRESS.
    • Downward movement of the whole bar.
    • Failure to finish with locked elbows.
    • Bar touching the belt or failing to touch the chest/abdominal area.

    Practical summary only. Federation rulebooks and meet-specific instructions remain the final authority.

    Practice the Commands

    Reading START, PRESS and RACK is easy. Waiting for them under a heavy bar is different. The trainer randomizes referee timing so you learn to react to the command instead of guessing when it will come.

    POWERLIFTING CALCULATOR

    Bench Press Command Trainer

    Practice referee commands with randomized meet-style timing.

    START · PRESS · RACK
    Rep 1 / 5
    READY
    Choose a federation and start the drill.
    How to use it: Follow the federation preset instead of predicting the referee. Tap "Bar is motionless at legal touch point" only when the bar is actually settled. The trainer then adds a randomized training-only delay before PRESS. These delay ranges are not federation pause standards. At lockout, wait for the final command before racking.

    For a barbell drill, have a training partner operate the controls while you keep both hands on the bar.

    How to practice with the bench press command trainer

    1. Select the federation for your meet. WPC skips START; the other presets include it.
    2. Choose voice commands and a training delay, then start the drill.
    3. When the bar has settled, your training partner taps “Bar is motionless at legal touch point”. Wait for PRESS.
    4. At straight arms, your partner taps “Locked out”. Wait for RACK before returning the bar.

    For a barbell drill, keep both hands on the bar and have a partner operate the controls. You can also rehearse the sequence without a loaded bar. The tool does not observe the bar or judge whether an attempt is legal.

    Referee Commands Step by Step

    Federations that use three commands follow the same basic order, but the details differ. Here is what the IPF and USA Powerlifting rulebooks describe:

    1. Wait at straight arms. After taking the bar from the rack, hold it with straight arms and locked elbows until the referee gives the signal.
    2. START. The signal is a downward movement of the referee’s arm together with the audible command “Start”. Only then lower the bar.
    3. Touch the chest or abdominal area and stop. The bar must be motionless before the next command. It may not touch the belt.
    4. PRESS. The referee gives the audible command “Press” once the bar is motionless. In USA Powerlifting the command is accompanied by an upward movement of the referee’s arm.
    5. Press to lockout and hold. Finish with straight arms and locked elbows and keep the bar still.
    6. RACK. The signal is a backward movement of the arm together with the audible command “Rack”. Only then return the bar to the rack.

    Good to know: if the bar sinks to the belt or fails to touch the chest or abdominal area, IPF and USA Powerlifting referees give the RACK command instead of PRESS. That attempt is not a lift you can still save, so keep the descent controlled and aimed at the chest.

    WUAP uses START, PRESS and RACK as well, with the final signal also given as “Odložiť”. WPC has no START command: after receiving the bar at straight arms you lower it, wait for the audible “Press” once the bar is motionless on the chest, and then wait for “Rack”. Always confirm the exact signals with your meet’s head referee at the lifters’ briefing.

    The Biggest Federation Differences

    Bench press rules compared: IPF, USA Powerlifting, WUAP and WPC
    Rule IPF USA Powerlifting WUAP WPC
    Commands START → PRESS → RACK START → PRESS → RACK START → PRESS → RACK / Odložiť PRESS → RACK
    Head Must stay on bench Not listed as required contact in 2026.2 bench section Optional Optional
    Shoulders Must stay on bench Must stay on bench Must stay on bench Must stay on bench
    Buttocks Must stay on bench Must stay on bench Must stay on bench Must stay on bench
    Feet Flat Flat Solid contact with soles or toes Shoes or toes in solid contact
    Grip width Max 81 cm Max 81 cm No limit (hand spacing is not limited) Max 81 cm
    Reverse grip No No Yes Yes
    Motionless chest position before PRESS Yes Yes Yes Yes
    IPF-style elbow-depth rule Yes Not stated in cited bench section Not stated in cited bench section Not stated in cited bench section

    WPC source note: the WPC column is based on the latest accessible WPC-hosted Official Rule Book found during this audit, the 2021 Edition. The current WPC rules page contains a broken legacy PDF link, so lifters should also check the current WPC rule updates and meet-specific instructions. Confirm the rules that apply at your event with the organisers.

    WUAP Bench Press Rules: A Major Difference to IPF

    WUAP Rules v3.5, effective March 1, 2026, require a START command for all bench press attempts, including RAW, Equipped, single-lift bench and bench within powerlifting.

    After receiving the bar at straight arms, the lifter waits for START, lowers the bar to the chest and waits until the bar is motionless for PRESS. The lifter then presses to fully extended arms and holds the bar motionless until the final rack/“Odložiť” command.

    WUAP differs from IPF in several important setup details: the head position is optional, hand spacing is not limited, reverse grip is permitted, and solid foot contact may be made using either the soles or the toes.

    Why Did My Bench Get Red Lights?

    Across federations, many failed benches come from technical errors rather than insufficient strength. The exact list depends on the rulebook, so check the one that applies to your meet. Use the Rule Checker above before meet day.

    IPF

    • Not following the referee’s signals.
    • Changing the chosen lifting position: raising the head, shoulders or buttocks, or moving the hands laterally on the bar.
    • Heaving or sinking the bar on the chest.
    • Any downward movement of the bar while it is being pressed.
    • Not lowering the bar to the chest or abdominal area, or touching the belt.
    • Not lowering the elbow joints level with or below the shoulder joints.
    • Not pressing to straight arms with locked elbows.
    • Feet touching the bench or its supports, or lifting the feet.
    • Spotter or loader contact with the bar or lifter between signals.
    • Deliberate contact between the bar and the rack supports.

    USA Powerlifting

    • Not following the referee’s signals.
    • Raising the shoulders or buttocks from their original contact points, moving the hands laterally on the bar, or raising the feet.
    • Heaving or sinking the bar after it is motionless on the chest.
    • Any downward movement of the whole bar while pressing.
    • Not lowering the bar to the chest or abdominal area, or touching the belt.
    • Not pressing to straight arms with locked elbows at the start and finish.
    • Any contact of the feet with the bench or its supports.
    • Deliberate contact between the bar and the rack or safety supports.
    • Dropping or dumping the bar before the start command or after the rack command.
    • An obvious failure to complete the lift, such as spotters helping to rerack.

    WUAP and WPC

    • Ignoring the referee’s signals.
    • Buttocks losing contact with the bench.
    • Moving the foot contact point or changing foot position during the lift.
    • Moving the hands laterally on the bar.
    • Bouncing the bar off the chest or sinking it after PRESS.
    • Pronounced uneven extension of the arms.
    • Any downward movement of the bar during the press.
    • Spotter contact with the bar between signals.
    • Shoes touching the bench or its supports.
    • Deliberate contact with the uprights to help complete the lift.

    The WUAP and WPC lists are practical summaries of the rule texts and are less detailed than the IPF and USA Powerlifting lists above. Because WUAP and WPC allow different setups, such as optional head position and reverse grip, the same technique can be legal in one federation and a red light in another.

    How Long Is the Bench Press Pause?

    In the four rulebooks compared here, no fixed stopwatch pause is specified. Instead, the bar must become motionless before the referee gives PRESS. That is why trying to predict a universal “one-second pause” is poor competition practice.

    Instead, practice becoming completely still and reacting to the referee. The Command Trainer above deliberately varies an additional training delay so you cannot predict PRESS; those simulated delay ranges are not federation rules.

    Choose Your Attempts

    Your opener should be a bench you can execute under strict meet commands even when the pause feels longer than expected. Your second attempt should build the result; the third attempt can then reflect performance, placing and PR goals.

    Open the free Powerlifting Attempt Planner → to build your squat, bench and deadlift plan. Use the Plate Loading Calculator to prepare your warm-up weights.

    Final Checklist Before Your Meet

    • Confirm which federation rules your meet uses.
    • Know the exact command sequence.
    • Practice your legal competition setup.
    • Know whether head contact is required.
    • Know the required foot position.
    • Confirm grip-width and reverse-grip rules.
    • Pause until the bar is clearly motionless.
    • Do not rack until the final command.

    Bench press rules FAQ

    How many commands are there in a powerlifting bench press?

    IPF, USA Powerlifting and WUAP use three: START, PRESS and RACK. The cited WPC rulebook uses two: PRESS and RACK. Select the correct preset for your meet.

    Is a competition bench pause always one second?

    No. The referee judges whether the bar is motionless. Do not count to one and press; wait for PRESS. The trainer’s delay settings are practice simulations, not official pause lengths.

    Can I lift my head or heels?

    It depends on the federation. IPF requires head contact and flat feet. The cited USA Powerlifting bench section requires shoulders and buttocks contact and flat feet. WUAP and WPC allow optional head position and solid contact through the shoes or toes.

    Can I rack as soon as I lock out?

    Wait until you are motionless at straight arms and the referee gives RACK. An early return to the rack can invalidate an otherwise successful press.

    Does the trainer judge my technique?

    No. It simulates command timing after you or your training partner confirm the bar position. Use the rule checker to understand the requirements and a qualified coach or referee to review your technique.

    Preparing for your first competition? Read the complete first powerlifting meet guide and download the free meet-day checklist. Check your weight class and find an event in the competition calendar.

    Sources

    Rules last checked against the official documents on 9 October 2026:

    Rulebooks change. This guide and the interactive tools are practical summaries; the current official federation rulebook and meet instructions remain the final authority.

  • How to Prepare for Your First Powerlifting Meet: Complete Beginner Guide

    How to Prepare for Your First Powerlifting Meet: Complete Beginner Guide

    Your first powerlifting meet can feel complicated even when squat, bench press and deadlift training already feels familiar. You know how to lift; the uncertainty is everything around it: entry forms, commands, equipment checks, warm-up timing and what happens after a missed attempt.

    This guide takes you from choosing a competition to completing your final deadlift. The aim is a manageable first competition: arrive prepared, put valid lifts on the scoreboard and leave with useful experience for your next meet.

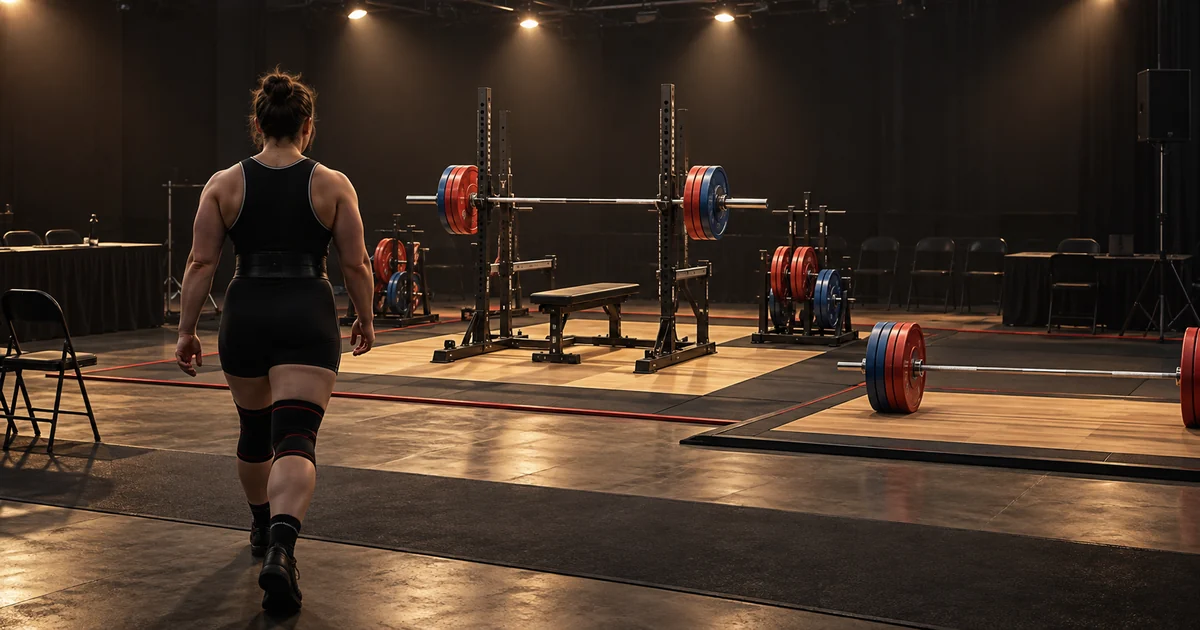
    Illustration of a lifter approaching a prepared powerlifting platform with a combo rack, bench and deadlift bar
    An original illustration of meet preparation. Your venue and equipment will differ.

    1. Choose the Right Powerlifting Meet

    A nearby beginner-friendly competition is often easier to manage than an event requiring substantial travel. Check the sanctioning federation, location, entry deadline and whether the event welcomes first-time lifters or requires a qualifying result.

    Read the entry form carefully. Raw, classic and equipped categories are not interchangeable, and the meaning of “raw” can differ between organisations. Check tested or non-tested status where applicable, age division, available weight classes and membership requirements. If anything is unclear, contact the organiser before paying.

    Use our Competition Calendar to find a powerlifting competition, then verify details with the official event page. For a more detailed comparison, see how to choose a powerlifting meet.

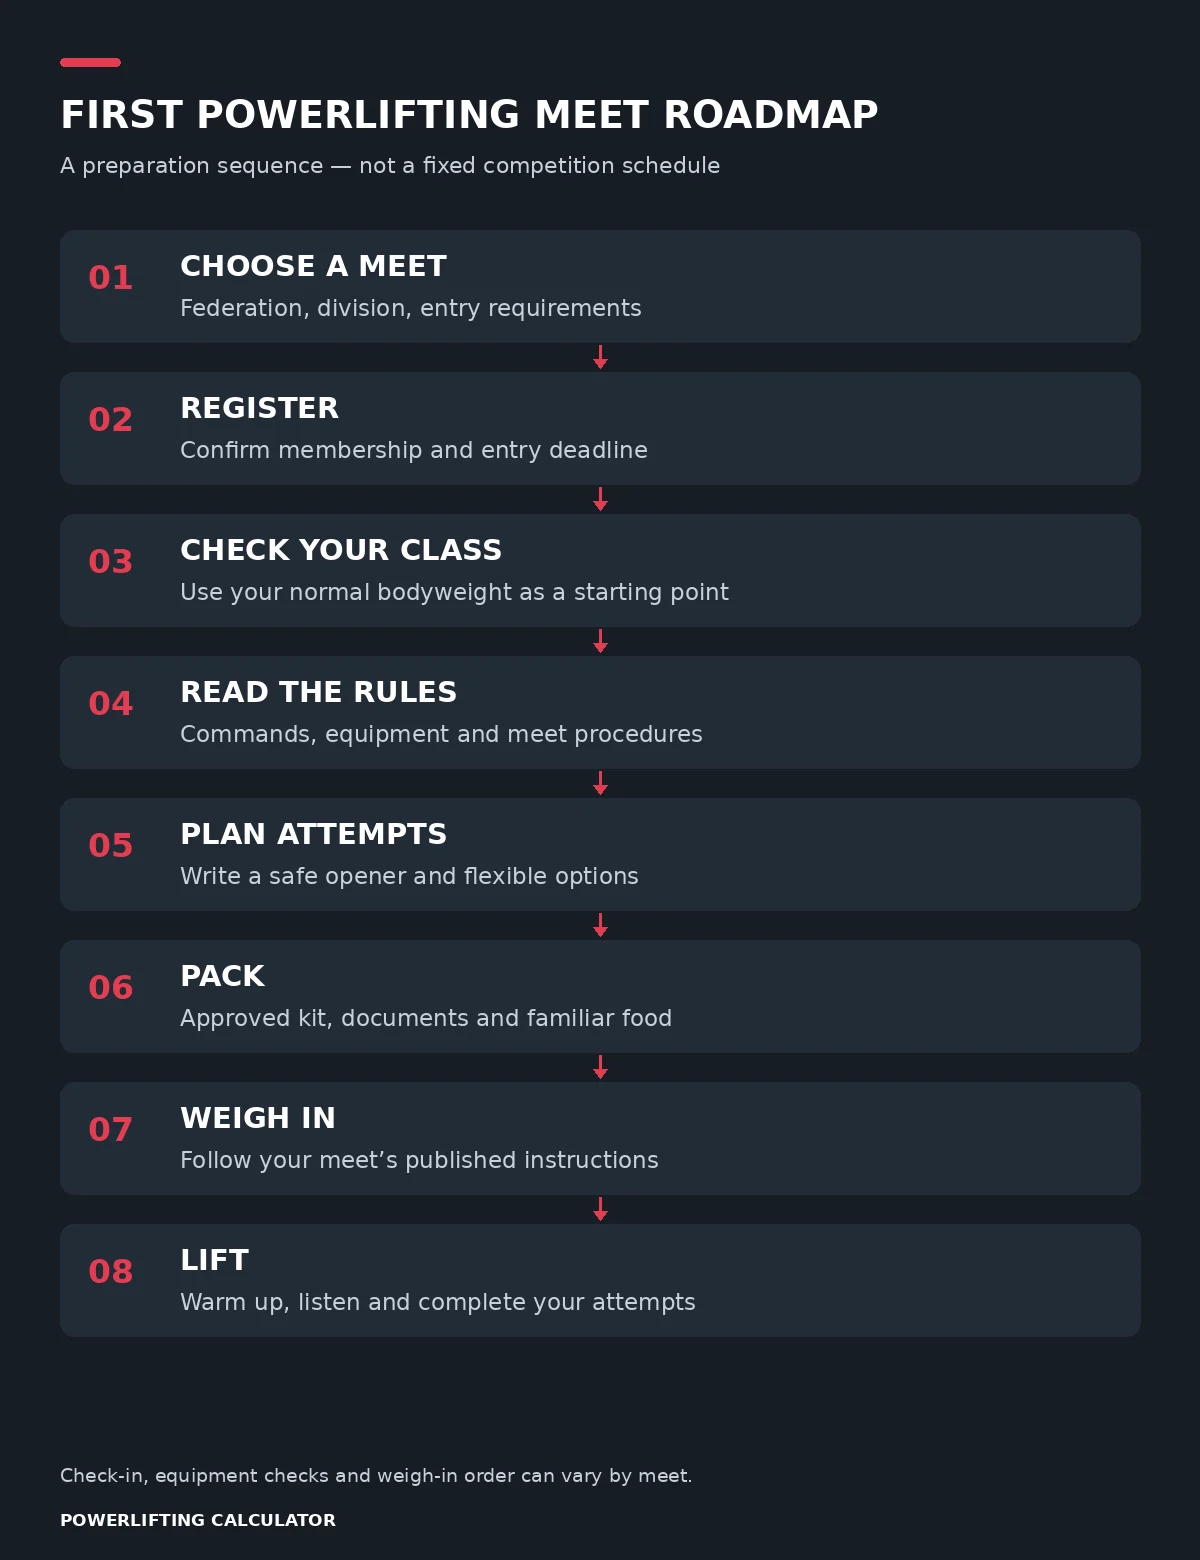
    First meet roadmap: choose a meet, register, check your class, read rules, plan attempts, pack, weigh in and lift
    A preparation roadmap. Registration requirements and meet-day administration vary; confirm your class before submitting your entry. Open the image for a larger view.

    2. Understand Your Weight Class

    A class number is generally a bodyweight limit or classification, not a target you must reach. You do not need to fill every kilogram of a class to belong in it. Start with your normal, measured bodyweight and the categories offered at your event.

    For a first competition, avoid adding an aggressive weight cut to an already unfamiliar day. Confirm what happens if your official weigh-in weight falls outside your nominated class; moving to another category is not something you should assume will be permitted.

    Check your weight class → Use the tool as a planning reference, then read Powerlifting Weight Classes Explained and confirm your eligibility with the organiser.

    3. Read the Rulebook Before Meet Day

    Gym habits are not automatically competition standards. Read the sections covering lift performance, commands, equipment and attempt submissions. Know the required squat depth, bench position and pause, and deadlift finish before your final training sessions.

    IPF example — verified against the March 2026 rulebook, version 3:
    • Squat: wait for “Squat”, reach the required depth with the top of the thigh at the hip joint below the top of the knee, finish upright and wait for “Rack”.
    • Bench: follow “Start”, hold the bar motionless for “Press”, complete the lift and wait for “Rack”. Position and depth requirements also apply.
    • Deadlift: finish upright with locked knees, then wait for “Down” before lowering under control.

    This is a short orientation, not a complete rule summary. Check your own federation’s wording and technical requirements.

    Read the official IPF Technical Rules if you compete under IPF rules. Other federations publish their own requirements.

    4. Practise Competition Commands

    Ask a training partner or coach to call the commands used at your meet. Rehearse the entire attempt: taking your position, waiting, lifting, holding the finish and returning the bar. A lift can feel physically comfortable yet become confusing when you are waiting for a voice instead of moving on your own timing.

    5. Plan Your Attempts

    Write a plan for each lift, with options rather than three immovable numbers. The opener should be dependable under competition conditions. Use the second to build your result and the third to respond to the strength you actually have that day.

    A reliable gym lift performed with competition technique is a better reference than an old personal record or a repetition that ignored the commands. If an opener is slower than expected, a smaller planned increase may make sense.

    Attempt strategy: opener secures the meet, second builds the total, third pushes only when performance supports it
    A decision framework, not a promise of particular weights or percentages.
    Illustrative attempt plan only — all weights in kilograms
    LiftOpenerSecondThird
    Squat180190200
    Bench125132.5140
    Deadlift215230240

    These numbers are not recommendations for your strength level. For the full reasoning, read Powerlifting Attempt Selection. Plan your meet attempts → The planner is an editable worksheet; check every suggested weight before using it.

    6. What to Bring to a Powerlifting Meet

    Pack ahead of travel, using the rulebook and your organiser’s instructions. “I use it in training” does not establish that a piece of equipment is permitted in your competition category.

    Competition equipment

    • Required lifting clothing, such as an approved singlet and T-shirt where applicable.
    • Suitable shoes and any required socks, including deadlift socks where specified.
    • Belt, wrist wraps and knee sleeves or wraps only where permitted.
    • Any additional federation-required items; check brands, sizes and category restrictions.

    Documents

    • ID and membership or registration information.
    • Meet confirmation and any forms requested by the organiser.
    • Your opening attempts and rack-height notes where relevant.

    Practical items

    • Water and familiar food.
    • Towel, warm clothing and spare clothing.
    • Phone charger, attempt notes and headphones if useful.
    • Travel, parking and venue information saved somewhere accessible.

    7. What Happens at Weigh-In?

    Check the published arrival and weigh-in arrangements before travelling. You may need to check in, present identification, have equipment inspected, record rack heights or submit opening attempts. The order and timing of these steps depend on the federation and event.

    Officials measure and record your bodyweight under the applicable procedure. Follow their instructions, and ask promptly if you are unsure about your nominated category or paperwork. Do not rely on an assumed universal two-hour or day-before weigh-in.

    Keep your attempt notes and relevant equipment accessible rather than buried in the bottom of a bag. Our Weight Class Checker helps with preparation; the official weigh-in determines the recorded competition bodyweight.

    8. Eating and Drinking on Meet Day

    Bring foods and drinks you already tolerate around training. Keep the plan simple and practical: food you can store safely, portions you can manage between lifts and fluids you can access throughout the day.

    A first meet is a poor time to experiment with unfamiliar supplements, unusually large meals or an improvised dehydration strategy. If you have medical or dietary needs, make your plan with an appropriate professional before the event. This guide does not prescribe a weight-cut or recovery protocol.

    9. How to Warm Up at a Powerlifting Meet

    The warm-up room is shared. Find your flight or lifting group, identify which rack or bar you will use and communicate with the other lifters. Be ready to change plates and share equipment rather than expecting a private training station.

    Work backwards from your estimated platform turn. Watch the actual lifting order and listen for updates; a printed start time is not enough if the session runs early or late. Use familiar weight jumps and avoid turning warm-ups into another workout.

    Warm-up flow: bar or light weight, build, moderate, last warm-up, rest, then opener
    Adapt the loads, repetitions and timing to your usual preparation and the actual platform order. There is no universal percentage ladder.

    Finish your last warm-up with time to recover and reach the platform calmly. If timing becomes unclear, ask an experienced handler or meet official rather than guessing. Have your equipment ready before your name is called.

    10. Meet Day: Step by Step

    Your Meet-Day Timeline

    Illustrative flow for a full three-lift meet. The order of check-in, equipment checks and weigh-in may differ.

    1. Arrive & Check In
    2. Equipment Check
    3. Weigh-In
    4. Eat / Hydrate / Prepare
    5. Squat Warm-Up
    6. Squat
    7. Bench Warm-Up
    8. Bench Press
    9. Deadlift Warm-Up
    10. Deadlift
    11. Final Total

    Exact schedules, weigh-in procedures and equipment checks vary by federation and competition. Always follow your meet information and current rulebook.

    This shows the broad flow of a full three-lift competition. Administration may happen in a different order, and each lift includes the attempts of other lifters in your group. Follow the organiser’s schedule and announcements throughout the day.

    11. Squat: Start With a Dependable Lift

    Confirm your rack setting, equipment and opener before your group begins. Use your normal warm-up cues, then focus on listening and completing the attempt rather than imagining the entire day at once.

    After the result, identify what happened and submit your next weight within the event’s deadline. Let the first attempt inform your next choice. If nerves affected the lift, simplify your next attempt to one or two useful cues.

    12. Bench Press: Reset After Squat

    Check the transition to bench instead of assuming you have a long break. Locate the bench warm-up area, confirm your rack setting and discuss any permitted hand-off with the relevant person.

    Remember the command and pause practice from training. After each attempt, deal with the result and next submission before becoming distracted by messages or videos. Your squat result is already recorded; give the bench its own clear plan.

    13. Deadlift: Finish the Day With a Clear Plan

    By deadlift, you may be tired and the warm-up room may feel different from the morning. Keep monitoring your group, use a familiar preparation sequence and avoid unnecessary extra pulls.

    A third deadlift can be more tactical because it completes the total and may affect placing. For your first meet, completing a sensible final attempt can be more useful than chasing an arbitrary number. Discuss changes with your handler and verify what the rules allow. The Attempt Selection guide covers this decision in more detail.

    14. What Does Going 9 for 9 Mean?

    Going 9 for 9 means all three squat, three bench and three deadlift attempts were successful. It is a useful description of a meet, not the only definition of success. A first competition can teach you a great deal even with a missed attempt.

    Record which attempts succeeded and why any were missed. For broader competition context, see our attempt-success analysis; its dataset is not a prediction for an individual beginner.

    15. After Your First Meet

    Save the official result and record your weigh-in bodyweight, best successful squat, bench and deadlift, and total. Add a few notes while the day is fresh: command errors, warm-up timing, equipment problems and which attempts felt well chosen.

    Use the homepage calculator to review your numbers. Our Powerlifting Total guide explains the result, while the DOTS guide explains bodyweight-adjusted comparison. Keep equipment categories and scoring formulas consistent; the Methodology page documents the calculator’s limits.

    Choose a small number of improvements for the next training block. When you are ready, return to the Competition Calendar and look for your next event.

    16. Common First-Meet Mistakes

    Opening too heavy

    Choose something dependable under the meet’s standards, not something you hope adrenaline will rescue.

    Not practising commands

    Rehearse waiting and finishing with a partner before competition day.

    Trying unfamiliar food

    Bring familiar options instead of turning the event into an experiment.

    Forgetting equipment

    Pack from the event requirements and check the bag before leaving.

    Ignoring the schedule

    Keep watching your group and listening to announcements, even between lifts.

    Poor warm-up timing

    Plan around your actual turn rather than completing every warm-up as early as possible.

    Unnecessary weight changes

    Confirm your category early and avoid improvising bodyweight management at your first meet.

    Making every third a mandatory PR

    Let performance guide the choice. A smaller successful increase still improves your result.

    17. Your First Powerlifting Meet Checklist

    Before leaving home, confirm your entry, membership, class and schedule. Check equipment, rehearse commands, write attempts, pack familiar food and save the organiser’s contact details. On arrival, identify your group, complete the required administration and plan warm-ups around the actual lifting order.

    Keep the free First Powerlifting Meet Checklist with your attempt notes. It includes packing lists, a warm-up worksheet and a printable attempt card. The PDF is delivered by email after confirmation; additional email tips are optional.

    Frequently Asked Questions

    What should I bring to my first powerlifting meet?

    Bring the equipment required and permitted by your federation, identification, entry or membership information, attempt notes, water and familiar food. Check the event instructions for extra documents or equipment requirements.

    How do powerlifting weigh-ins work?

    Officials measure and record bodyweight using the event’s procedure. Check-in, equipment inspection, rack heights and opener submissions may happen alongside it. Timing and permitted re-weighs vary; follow the organiser and rulebook.

    What should my opening attempts be?

    Choose lifts you can reliably reproduce with competition technique and commands. Account for nerves and unfamiliar equipment. A percentage can support a plan, but it cannot establish that a lift is dependable.

    How long does a powerlifting meet take?

    There is no universal duration. It depends on the number of lifters, flights, platforms, disciplines and schedule. Ask the organiser for your session information and allow time for delays and travel.

    Do I need a coach for my first powerlifting meet?

    An experienced coach or handler can help with timing and decisions. Check the meet’s access and accreditation rules if someone will accompany you. If you attend without one, prepare carefully and ask officials how to navigate the process.

    What happens if I miss an attempt?

    Identify the reason, use the attempts remaining and submit the next weight under the rules. In IPF full meets, three failed attempts in one lift eliminate the overall total. Your federation determines continuation and individual-lift eligibility.

    What does going 9 for 9 mean?

    All nine attempts in a full meet were successful: three squat, three bench press and three deadlift. It describes attempt success; it does not establish how heavy the result was.

    Can I change my attempts during a powerlifting meet?

    Only within the applicable rules and deadlines. Do not assume a submitted weight can be changed or reduced. Check the organiser’s procedure and our Attempt Selection guide before you submit an adjustment.

    Sources and Scope

    This is general preparation advice, not a personalised training, nutrition or weight-cut programme. The explicitly labelled IPF example was checked on 30 September 2026 against the English Technical Rulebook effective 1 March 2026, version 3, especially sections 4 and 6. Other federations and individual events may differ.

  • How Often Do Powerlifters Make Each Attempt?

    How Often Do Powerlifters Make Each Attempt?

    Introduction

    The powerlifting attempt success rate tells us how often recorded first, second and third attempts were made in real meets. It offers useful context for choosing weights, but it cannot tell you what your own next attempt should be. An opener that establishes a total and a third attempt chasing a record serve different purposes.

    We analyzed recent raw, full-power competition results from OpenPowerlifting. The live data below keeps squat, bench press and deadlift separate and compares attempt number within each lift. It counts recorded attempts, not every possible attempt slot, and updates when the Trend Radar dataset is refreshed.

    Powerlifting Attempt Success Rate: First, Second and Third Attempts

    Each row gives the success rate for a lift and attempt number, together with the recorded total, makes and misses. The graphic lets you compare the nine combinations at a glance; use the counts in the table to judge how much evidence sits behind a percentage.

    Attempt Success by Attempt Number

    Raw full-power SBD · All included lifters · OpenPowerlifting · Last 3 years
    Data updated: October 11, 2026

    Squat

    #188.4%
    #284.0%
    #366.9%

    Bench Press

    #191.7%
    #281.4%
    #349.3%

    Deadlift

    #195.0%
    #288.5%
    #361.2%
    LiftAttemptRecordedSuccessfulFailedSuccess rate
    Squat1345,397305,34340,05488.4%
    Squat2343,435288,46854,96784.0%
    Squat3338,934226,601112,33366.9%
    Bench Press1344,724316,08628,63891.7%
    Bench Press2342,772278,92863,84481.4%
    Bench Press3337,388166,380171,00849.3%
    Deadlift1343,762326,57917,18395.0%
    Deadlift2340,594301,58439,01088.5%
    Deadlift3335,251205,252129,99961.2%

    What the data shows

    • For squat, third-attempt success was 21.5 percentage points lower than first-attempt success (66.9% vs 88.4%).
    • For bench, third-attempt success was 42.4 percentage points lower than first-attempt success (49.3% vs 91.7%).
    • For deadlift, third-attempt success was 33.8 percentage points lower than first-attempt success (61.2% vs 95.0%).
    • These figures describe recorded competition attempts and do not by themselves show whether attempt selection strategy caused a make or miss.

    Data source: OpenPowerlifting. Analysis generated by Powerlifting Calculator.

    What the Data Shows

    Read the results within each lift first: compare its opener, second and third attempts, then look across the lifts. A success rate is the share of recorded attempts that were successful, not a personal probability of making that weight. Differences can reflect changing goals, lifter experience, meet conditions and selection of who reaches a particular attempt.

    Why First Attempts Matter

    An opener normally aims to secure a valid lift and provide a reliable starting point. Missing it creates immediate pressure to get on the board. Our Powerlifting Attempt Selection guide explains how to choose openers and adapt after a miss under meet rules.

    Why Third Attempts Are Different

    A third attempt may be chosen for a personal record, qualifying total or placing. The lifter may deliberately accept more risk after securing an earlier result. A lower observed third-attempt success rate therefore does not by itself prove a poor strategy. The dataset records outcomes, not the reasons behind each decision.

    Squat, Bench and Deadlift Are Not Identical

    The three lifts occur at different points in the meet and present different technical and strategic choices. Fatigue, commands and the need for a final total can influence the weights selected. Keeping the lifts separate avoids hiding those differences inside one overall percentage. Your powerlifting total uses the best successful result from each lift, so one missed attempt does not necessarily reduce the final total.

    How to Use This Data for Your Own Meet

    Use the observed rates to ask better questions about your plan: is the opener repeatable under commands, what total does the second attempt secure, and what risk is worth taking on the third? Your recent training, judging standards and meet-day readiness matter more than matching an aggregate percentage. If a weight cut affects your plan, confirm your class and the event rules with our weight-class checker.

    Plan Your Powerlifting Attempts

    Turn a recent successful single into a tentative meet-day plan with the Powerlifting Attempt Planner. Reassess the plan after each lift rather than treating the suggested weights as a prediction.

    After the meet, use the DOTS Calculator to put your successful total in bodyweight-adjusted context. The separate DOTS by weight class analysis explores observed score distributions; neither measure rates the quality of your attempt choices.

    The data pipeline’s inclusion rules, denominator and limitations are documented below.

    Methodology

    Raw full-power SBD · All included lifters · OpenPowerlifting · Last 3 years
    Data updated: October 11, 2026

    Squat

    #188.4%
    #284.0%
    #366.9%

    Bench Press

    #191.7%
    #281.4%
    #349.3%

    Deadlift

    #195.0%
    #288.5%
    #361.2%

    Methodology

    • Source: OpenPowerlifting
    • Source Url: https://www.openpowerlifting.org/
    • Analysis Window: Last 3 years
    • Cutoff Date: 2023-10-13
    • Generated At: 2026-10-11T22:17:22.508590+00:00
    • Event: SBD
    • Equipment: Raw
    • Sexes: M, F
    • Success Definition: Positive attempt weight = successful; negative attempt weight = failed.
    • Missing Attempts: Blank or zero attempt values are excluded from the denominator rather than counted as failures.
    • Deduplication: Exact duplicate meet rows removed using lifter, date, meet, federation and all nine attempt fields.
    • Unit Of Analysis: Recorded individual competition attempts.

    Limitations

    • OpenPowerlifting coverage is broad but is not a complete census of every powerlifting competition.
    • Some federations or meets may have incomplete attempt-level data; blank or zero attempts are excluded.
    • Federations differ in rules, judging standards, competitive depth and meet structure.
    • The analysis is descriptive and does not establish that later attempt number itself causes a lower or higher success rate.
    • A lifter can contribute attempts from multiple competitions within the analysis window.
    • Only Raw full-power SBD performances are included in this version.

    Data source: OpenPowerlifting. Analysis generated by Powerlifting Calculator.

    A single missed attempt is different from losing every attempt on a lift. Our powerlifting bomb-out rates analysis compares confirmed three-miss sequences in squat, bench and deadlift, using a separate complete-attempt sample for each lift.

    How We Define a Successful Attempt

    In OpenPowerlifting attempt fields, a positive weight records a successful lift and a negative weight records a failed lift. A blank or zero value is missing or unrecorded and is excluded from the denominator. It must not be counted as a failed attempt.

    This is a descriptive analysis of recorded competition outcomes. It does not prove that attempt number causes a make or miss, nor can it isolate the effect of coaching, judging, fatigue or goals. The live methodology and limitations above give the precise scope of the current snapshot.

    Data Source

    Source: OpenPowerlifting. Powerlifting Calculator Trend Radar generates the charts and summaries when its analysis pipeline is refreshed. For the site’s calculation rules and general limitations, see Methodology & Sources.

  • How Do DOTS Scores Differ by Weight Class?

    Introduction

    A DOTS score by weight class gives a different view of powerlifting performance than a list of records. DOTS adjusts a competition total for bodyweight, so lifters of different sizes can be compared on one scale. But do the scores recorded in real meets have the same distribution in every class?

    We use recent raw, full-power results from OpenPowerlifting to examine the middle of each class, the spread around it, and the upper end. The charts and tables below update with the Trend Radar dataset. They describe the included performances; they are not targets that every lifter should reach or evidence that bodyweight class causes a particular score.

    Men: DOTS Score by Weight Class

    Read the chart from left to right to compare median scores across the included men’s classes. The table adds the sample size and spread, so a difference between two bars can be viewed in context.

    DOTS by Weight Class — Men

    Raw full-power SBD · OpenPowerlifting · Last 3 years
    Data updated: October 11, 2026
    Weight classNMedian DOTSMeanQ1Q3P90
    30 kg50127.11129.66110.75146.18172.87
    35 kg96149.36151.85127.11173.51198.61
    40 kg78178.91178.36152.53199.56224.04
    44 kg61187.66188.82154.19211.6247.43
    48 kg71183.42179.24138.88210.43229.17
    51.7 kg225244.52251.17210.12288.33325.19
    52 kg993243.39247.36197.02289.17342.21
    53 kg845324.92317.09261.76380.9413.24
    55.7 kg258268.72270.64240.94299.18330.71
    56 kg1,318294.99298.27242.29354.62407.4
    59 kg3,598368.43360.75310.26416.28454.72
    59.8 kg389273.81274.25238.78306.99340.83
    60 kg2,844323.75319.5260.59378.73420.53
    62 kg135366.97350.28298.34417.91445.66
    66 kg9,070373.15369.47327.54416.66456.92
    67.1 kg666274.2277.53234.66311.68351.5
    67.5 kg8,356343.94338.28288.33391.54431.17
    69 kg279365.78368.06324.74416.25462.95
    74 kg18,070372.73371.1330.17413.94454.2
    74.8 kg749287.54287.63247.02328.15357.11
    75 kg14,853356.09351.42308.47399.92438
    77 kg442359.93362.92319.42409.13454.38
    82.1 kg691284.17284.7241.43321.66364.8
    82.5 kg18,813361.53358.42318.01403.7440.6
    83 kg26,409374373.4333.94416.1454.1
    83+ kg58352.79360.12324.45402.34435.38
    85 kg535354.54355.06321.25394.52427.59
    89.8 kg683280.68277.82231.53322.66353.13
    90 kg20,144364.58362.12321.29406.44444.93
    90+ kg41360.69360.07327.45386.8416.12
    93 kg27,645376.08374.6335.3415.96452.65
    93+ kg150366.03364.47339.59396.46440.7
    94 kg479358.08354.59311.43395.61429.36
    99.7 kg720274.7270.81230.36310.66339.63
    100 kg19,110364.83361.93320.07408.5447.81
    100+ kg43357.4355.21322.56386.06403.72
    105 kg20,187378.88376.31336.51419.73456.22
    105+ kg102338.88342.26304.22398.4439.59
    109.7 kg539279.69277.4242.91315.56345.98
    110 kg13,377367.2363.88319.56412.88451.79
    118 kg68341.5352.85317.65386.34452.75
    120 kg10,282379.63376.37334.08421.54460.86
    120+ kg5,036371.09366.87321.99414.83455.54
    124.7 kg548278.99275.46242.89307.69333.87
    125 kg9,126364.35361.25310.95412.16454.97
    139.7 kg294287.28281248.39315.72339.97
    139.7+ kg219269.93263.11227.36303.9323.47
    140 kg3,961354.29351.75296.95406.85452.92
    140+ kg2,529347.44348.75289.66407.67455.75

    What the data shows

    • Among included men classes, the highest median DOTS is 379.63 in the 120 kg class (n=10282).
    • The lowest included median is 127.11 in the 30 kg class (n=50); the descriptive median range is 252.52 DOTS.
    • The highest 90th-percentile benchmark is 462.95 DOTS in the 69 kg class.
    • These are descriptive differences between observed competition performances and should not be interpreted as a causal effect of weight class.

    Data source: OpenPowerlifting. Analysis generated by Powerlifting Calculator.

    Women: DOTS by Weight Class

    The women’s results are presented separately because DOTS uses sex-specific coefficients and the competition populations differ. Compare classes within this section while keeping the number of included performances in view.

    DOTS by Weight Class — Women

    Raw full-power SBD · OpenPowerlifting · Last 3 years
    Data updated: October 11, 2026
    Weight classNMedian DOTSMeanQ1Q3P90
    30 kg62131.4134.7108.02151.82182.26
    35 kg47163.33162.32148.48185.6201.93
    40 kg78185.6189.25170.75204.16238.68
    43 kg278312.31312.43272.47360.49405.16
    44 kg743249.45251.38200.81295.79348.06
    44.2 kg232244.77247.1210.47283.89312.08
    47 kg1,881356.81353.83300.82408.21453.53
    47.8 kg316242.15243.55207.77275.09305.24
    48 kg1,616292.06297.32236.17354.51402.56
    51.9 kg445246.63247.72217.79275.08313.81
    52 kg7,450338.25337.31281.76393.11439.73
    53 kg116318.82314.24265.4359.4404.42
    56 kg5,497310.88312.05257.29363.67410.47
    57 kg7,988361.73361.01315.66406.9450.07
    58 kg184314.38314.35277.72353.06395.4
    60 kg6,962323.53325.12272.65375.68421.04
    60+ kg49336.52336.16298.29361.18394.38
    60.1 kg623247.67249.38209.86284.56314.58
    63 kg11,378355354.95309.31400442.54
    63+ kg40338.35316.35286.44364.19376.39
    64 kg173309.8310.62261.75346.7391.52
    65 kg1,785336.42334.57281.83389.57431.6
    67.3 kg819248.34249.15214.37285.73312.38
    67.5 kg9,447320.14320.92270.64368.85412.97
    67.5+ kg36337.06348.36305.52383.04413.65
    69 kg11,941351.78353.21308.91397.54440.75
    69+ kg48308.18317.36264.81356.44411.82
    70 kg1,788333.85331.31279.67382.38426.19
    72 kg152311.86312.32272.34351.48386.26
    75 kg10,819312.59313.99262.01361.65410.61
    76 kg9,592350.19350.3303.22396.71440.18
    76+ kg59332.49322.02281.49365.83401.34
    80 kg64316.26312.69277.59340.32385.92
    82.3 kg556236.25236.31200.22268.88297.29
    82.5 kg7,437309.88311.08264.94355.75401.12
    84 kg6,518339.53340.24293.42386.58432.36
    84+ kg6,756313.7315.06267.79360.76401.76
    90 kg5,855297.72299.71251.3345.1389.06
    90+ kg341277.34285.54245.24323.15368.73
    100 kg4,330292.19295.27244.9342.34385.91
    100+ kg2,019299.09301.25254344.97386.62
    110 kg1,514281.2285.94234.74331.09375.32
    110+ kg1,159285.09284.61237.76326.4366.32
    117.5 kg306234.78233.99201.87265.75300.94
    117.5+ kg185221.22224.73195.31261.15285.28
    125 kg244305.02302.06254345.51391.04
    140 kg125288.3296.39252.48333.86379.79
    140+ kg35300.07310.63256.28373.34411.85

    What the data shows

    • Among included women classes, the highest median DOTS is 361.73 in the 57 kg class (n=7988).
    • The lowest included median is 131.4 in the 30 kg class (n=62); the descriptive median range is 230.33 DOTS.
    • The highest 90th-percentile benchmark is 453.53 DOTS in the 47 kg class.
    • These are descriptive differences between observed competition performances and should not be interpreted as a causal effect of weight class.

    Data source: OpenPowerlifting. Analysis generated by Powerlifting Calculator.

    What Does This Mean for Your DOTS Score?

    Find the class that matches your competition weigh-in, then use its median and quartiles as a reference for the performances in this dataset. These rows preserve the reported class labels across federations, whose limits and competitive pools can differ. They are not one universal class ladder. Check the rules for your meet; our Powerlifting Weight Classes guide and checker can help you understand the boundaries.

    N is the number of qualifying performances. Median DOTS is the middle observed score: roughly half of included results fall on either side. Q1 and Q3 mark the 25th and 75th percentiles, enclosing the middle half. P90 is the 90th percentile, with roughly one in ten included performances above it. These are summaries of results, not official performance standards.

    Calculate Your DOTS Score

    Enter your bodyweight and three-lift total in the DOTS Calculator, then return to the distributions above to put your result in context.

    Why Median DOTS Matters

    The mean adds the scores and divides by N. A few unusually high or low results can move it. The median identifies the midpoint of the observed distribution and is often a steadier description of a typical result. We show both: the chart emphasizes the median, while the table lets you see whether the mean tells a different story.

    Look at Q1 and Q3 alongside the median. A wider gap means the middle half of results is more spread out; a narrow gap means those results are closer together. P90 adds an upper-end reference without reducing the analysis to record holders.

    Can You Compare Your Score Directly With a Weight Class?

    You can compare your competition DOTS with this dataset as a descriptive benchmark, especially when the sex, equipment, event type and rules match. The table does not rank every powerlifter or predict your placing at a future meet. Participation, federation mix, experience and geography can change the observed distribution even when the DOTS formula stays the same.

    For broader editorial milestones, read What Is a Good DOTS Score?. To understand why another formula may produce a different result, see DOTS vs Wilks vs IPF GL. If you are comparing kilograms lifted rather than bodyweight-adjusted performance, start with How Strong Am I? Understanding Your Powerlifting Total.

    The live methodology and dataset refresh information below come from the same analysis as the charts and tables. The analysis is generated from OpenPowerlifting competition data and reviewed before publication.

    Methodology

    Raw full-power SBD · OpenPowerlifting · Last 3 years
    Data updated: October 11, 2026

    Methodology

    • Source: OpenPowerlifting
    • Source Url: https://www.openpowerlifting.org/
    • Analysis Window: Last 3 years
    • Cutoff Date: 2023-10-13
    • Generated At: 2026-10-11T22:17:09.381302+00:00
    • Event: SBD
    • Equipment: Raw
    • Sexes: M, F
    • Minimum Group Size: 30
    • Deduplication: Exact performance duplicates removed using lifter, date, meet, federation, class, total and DOTS.
    • Statistics: Median, arithmetic mean, Q1 (25th percentile), Q3 (75th percentile), and P90 (90th percentile). Percentiles use linear interpolation.

    Limitations

    • OpenPowerlifting coverage is broad but not a complete census of every powerlifting competition worldwide.
    • Weight-class rules and competitive depth vary across federations, countries and time periods.
    • This is an observational comparison. Differences between weight classes should not be interpreted as being caused by bodyweight class itself.
    • Only Raw full-power SBD performances with valid DOTS, total and weight-class data are included.
    • A single lifter can appear more than once if they competed in multiple meets; the unit of analysis is a competition performance, not a unique athlete.
    • Weight classes with fewer than 30 qualifying performances are omitted to reduce unstable small-sample summaries.

    Data source: OpenPowerlifting. Analysis generated by Powerlifting Calculator.

    Limitations

    The limitations supplied by the data analysis appear directly above. This is a descriptive study of recorded performances, not a controlled experiment or proof that a weight class causes differences in strength. Results may change when new meets are synced, and smaller classes warrant more caution when reading percentiles.

    Data Source

    Competition data: OpenPowerlifting. The Powerlifting Calculator Trend Radar processes these results into the live summaries shown here. For the DOTS formula and the calculator’s boundaries, see our formulas and methodology.

Follow us on Facebook